Setting Up My Own Single Sign-On Solution


I love self-hosting a wide variety of services on my VPS, but as the number of these self-hosted services grew, managing separate accounts and passwords for each one became increasingly tedious. Another frustration was the state of authentication in many open source projects. Most of the services I self-host either only support basic 2FA, or don't support two-factor authentication at all. No wonder to say features like password recovery or advanced account configurations are almost always missing.
So I thought, why not introduce my own single sign-on (SSO) solution?
Picking the SSO Solution
Naturally, SaaS and major cloud provider solutions were out of the question for me—I wanted a fully open-source, self-hosted setup. The most popular open-source single sign-on (SSO) solutions are Keycloak, Authentik, and Authelia.
 Keycloak Team




After comparing these options, I noticed a few major differences:
- Keycloak is by far the most well-known and established option. It’s written in Java, has a long development history, and offers a very comprehensive admin UI. Keycloak is highly scalable and is widely used in production for larger deployments. Many online developer communities mention its ability to handle large numbers of concurrent users efficiently.
- Authentik is a newer project, written in Python, with a modern codebase and interface. One thing that stood out to me was how Authentik actually includes a feature comparison table with Keycloak, which made evaluating their differences much easier. In my experience, Authentik’s UI/UX is much more modern and user-friendly than Keycloak’s. This is particularly important since I want my self-hosted services to be accessible not only to me, but also to my family and friends, and some may be public-facing.
- Authelia is special in that it doesn’t have an admin UI at all; all configuration is done via config files. While this might suit some power users, I found it too user-unfriendly for my needs. Since some of my services are public-facing or shared with non-technical users, I wanted something with a proper admin interface. So, I ruled out Authelia despite it likely being the most performant (since it's written in Go).
Ultimately, my choice came down to Keycloak vs. Authentik. I decided to go with Authentik for a few reasons:
- The documentation clearly lays out the differences and, for my use case, Authentik checked all the boxes I needed.
- I really prefer Authentik’s cleaner, more modern UI and overall design.
- Its setup and configuration felt more straightforward for my scenario.
However, choosing Authentik does come with some drawbacks. Since it’s written in Python, I noticed that even a single repeated request could spike the CPU usage during my self-hosting tests. Keycloak, on the other hand, is known to be more scalable and handles high concurrency better, though I haven’t personally tested this.
Authentik is far from perfect. For example, if you compare it to better-auth—a TypeScript authentication library that is headless by default (with optional UI projects like better-auth-ui)—there are some areas where Authentik falls short.
A few things I dislike:
- Numeric IDs, Mostly: Authentik assigns numeric IDs to both users and applications. Personally, I prefer UUIDs.
- Sign-In Page Customization: The user-facing sign-in page is not very customizable. By default, it only supports either email or email+password inputs, plus a passkey button after you configure. If you want to add magic link sign-in (where users receive a link via email), it’s not straightforward. You can technically create another flow for this, but you can’t have both options on the same page. Instead, users must navigate to a different page or be redirected, which isn’t flexible or user-friendly. (And also, there is no way to directly add another button to go to another flow.)
- External Service Connections: Each external service (OAuth method) can only be connected once, limiting flexibility if you need multiple integrations of the same type.
These limitations don’t make Authentik unusable, but they’re definitely things to keep in mind, especially if you’re comparing it to more developer-focused or customizable solutions.
Setup


docker-compose.yml
services:
  postgresql:
    env_file:
      - .env
    environment:
      POSTGRES_DB: ${PG_DB:-authentik}
      POSTGRES_PASSWORD: ${PG_PASS:?database password required}
      POSTGRES_USER: ${PG_USER:-authentik}
    healthcheck:
      interval: 30s
      retries: 5
      start_period: 20s
      test:
        - CMD-SHELL
        - pg_isready -d $${POSTGRES_DB} -U $${POSTGRES_USER}
      timeout: 5s
    image: docker.io/library/postgres:16-alpine
    restart: unless-stopped
    volumes:
      - database:/var/lib/postgresql/data
  server:
    command: server
    depends_on:
      postgresql:
        condition: service_healthy
    env_file:
      - .env
    environment:
      AUTHENTIK_POSTGRESQL__HOST: postgresql
      AUTHENTIK_POSTGRESQL__NAME: ${PG_DB:-authentik}
      AUTHENTIK_POSTGRESQL__PASSWORD: ${PG_PASS}
      AUTHENTIK_POSTGRESQL__USER: ${PG_USER:-authentik}
      AUTHENTIK_SECRET_KEY: ${AUTHENTIK_SECRET_KEY:?secret key required}
      SSL_CERT_FILE: /etc/ssl/certs/postal-cert.crt # For sending emails
    image: ${AUTHENTIK_IMAGE:-ghcr.io/goauthentik/server}:${AUTHENTIK_TAG:-2025.10.0}
    ports:
      - ${COMPOSE_PORT_HTTP:-9000}:9000
      - ${COMPOSE_PORT_HTTPS:-9443}:9443
    restart: unless-stopped
    volumes:
      - ./media:/media
      - ./custom-templates:/templates
      - ./postal-cert.crt:/etc/ssl/certs/postal-cert.crt:ro # For sending emails
  worker:
    command: worker
    depends_on:
      postgresql:
        condition: service_healthy
    env_file:
      - .env
    environment:
      AUTHENTIK_POSTGRESQL__HOST: postgresql
      AUTHENTIK_POSTGRESQL__NAME: ${PG_DB:-authentik}
      AUTHENTIK_POSTGRESQL__PASSWORD: ${PG_PASS}
      AUTHENTIK_POSTGRESQL__USER: ${PG_USER:-authentik}
      AUTHENTIK_SECRET_KEY: ${AUTHENTIK_SECRET_KEY:?secret key required}
      SSL_CERT_FILE: /etc/ssl/certs/postal-cert.crt
    image: ${AUTHENTIK_IMAGE:-ghcr.io/goauthentik/server}:${AUTHENTIK_TAG:-2025.10.0}
    restart: unless-stopped
    user: root
    volumes:
      - /var/run/docker.sock:/var/run/docker.sock
      - ./media:/media
      - ./certs:/certs
      - ./custom-templates:/templates
      - ./postal-cert.crt:/etc/ssl/certs/postal-cert.crt:ro

volumes:
  database:
    driver: local
.env is also required (see guide).
Adding an Application
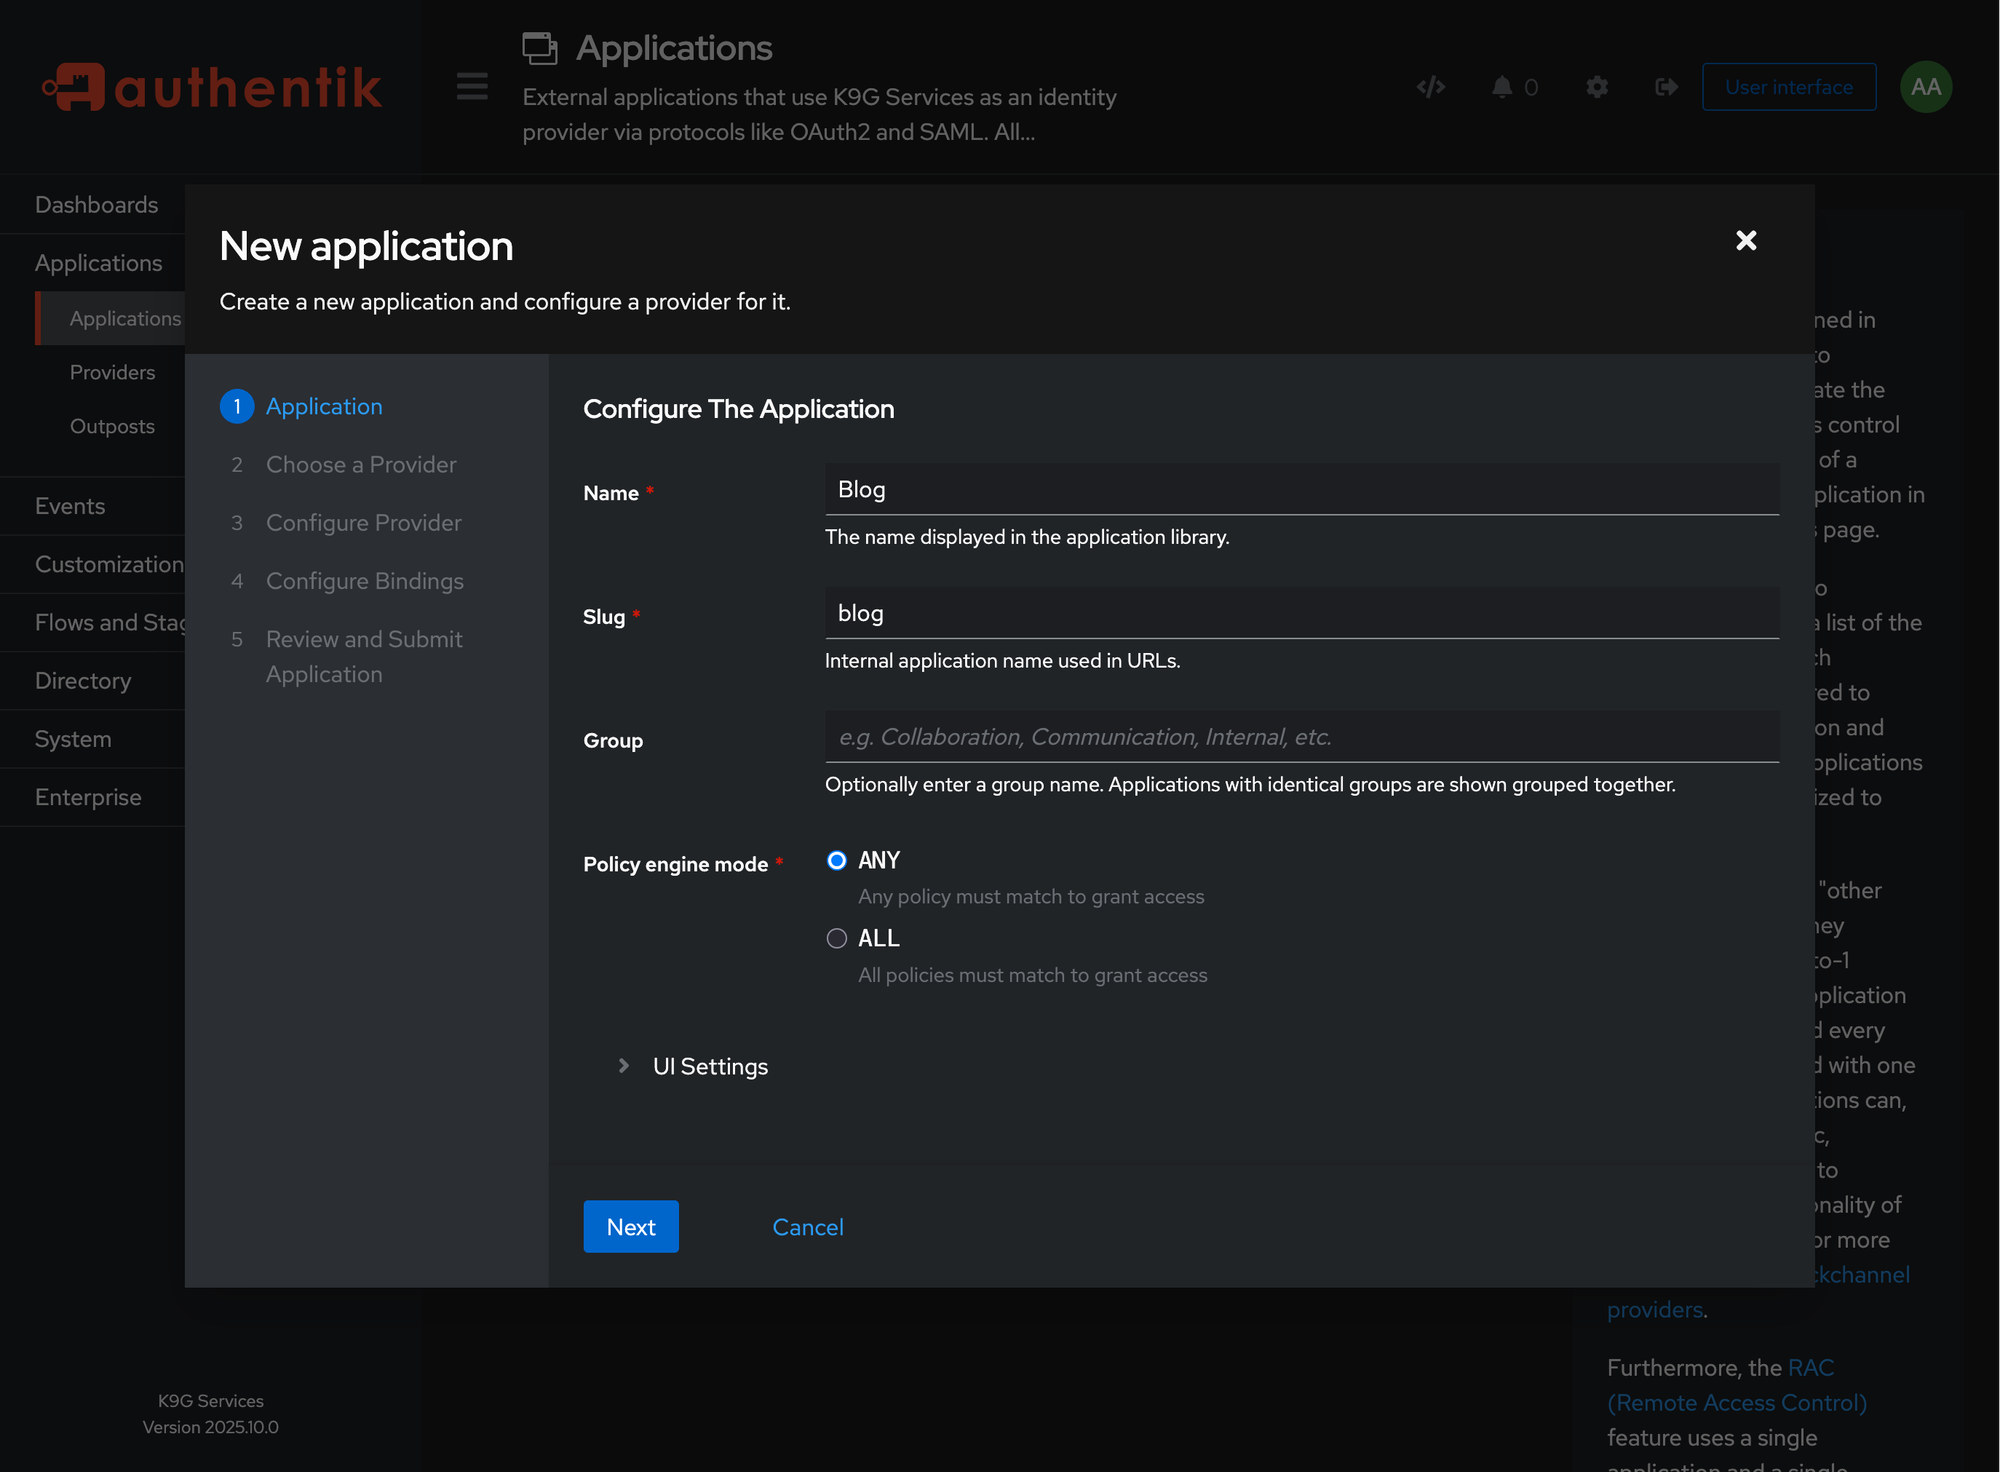
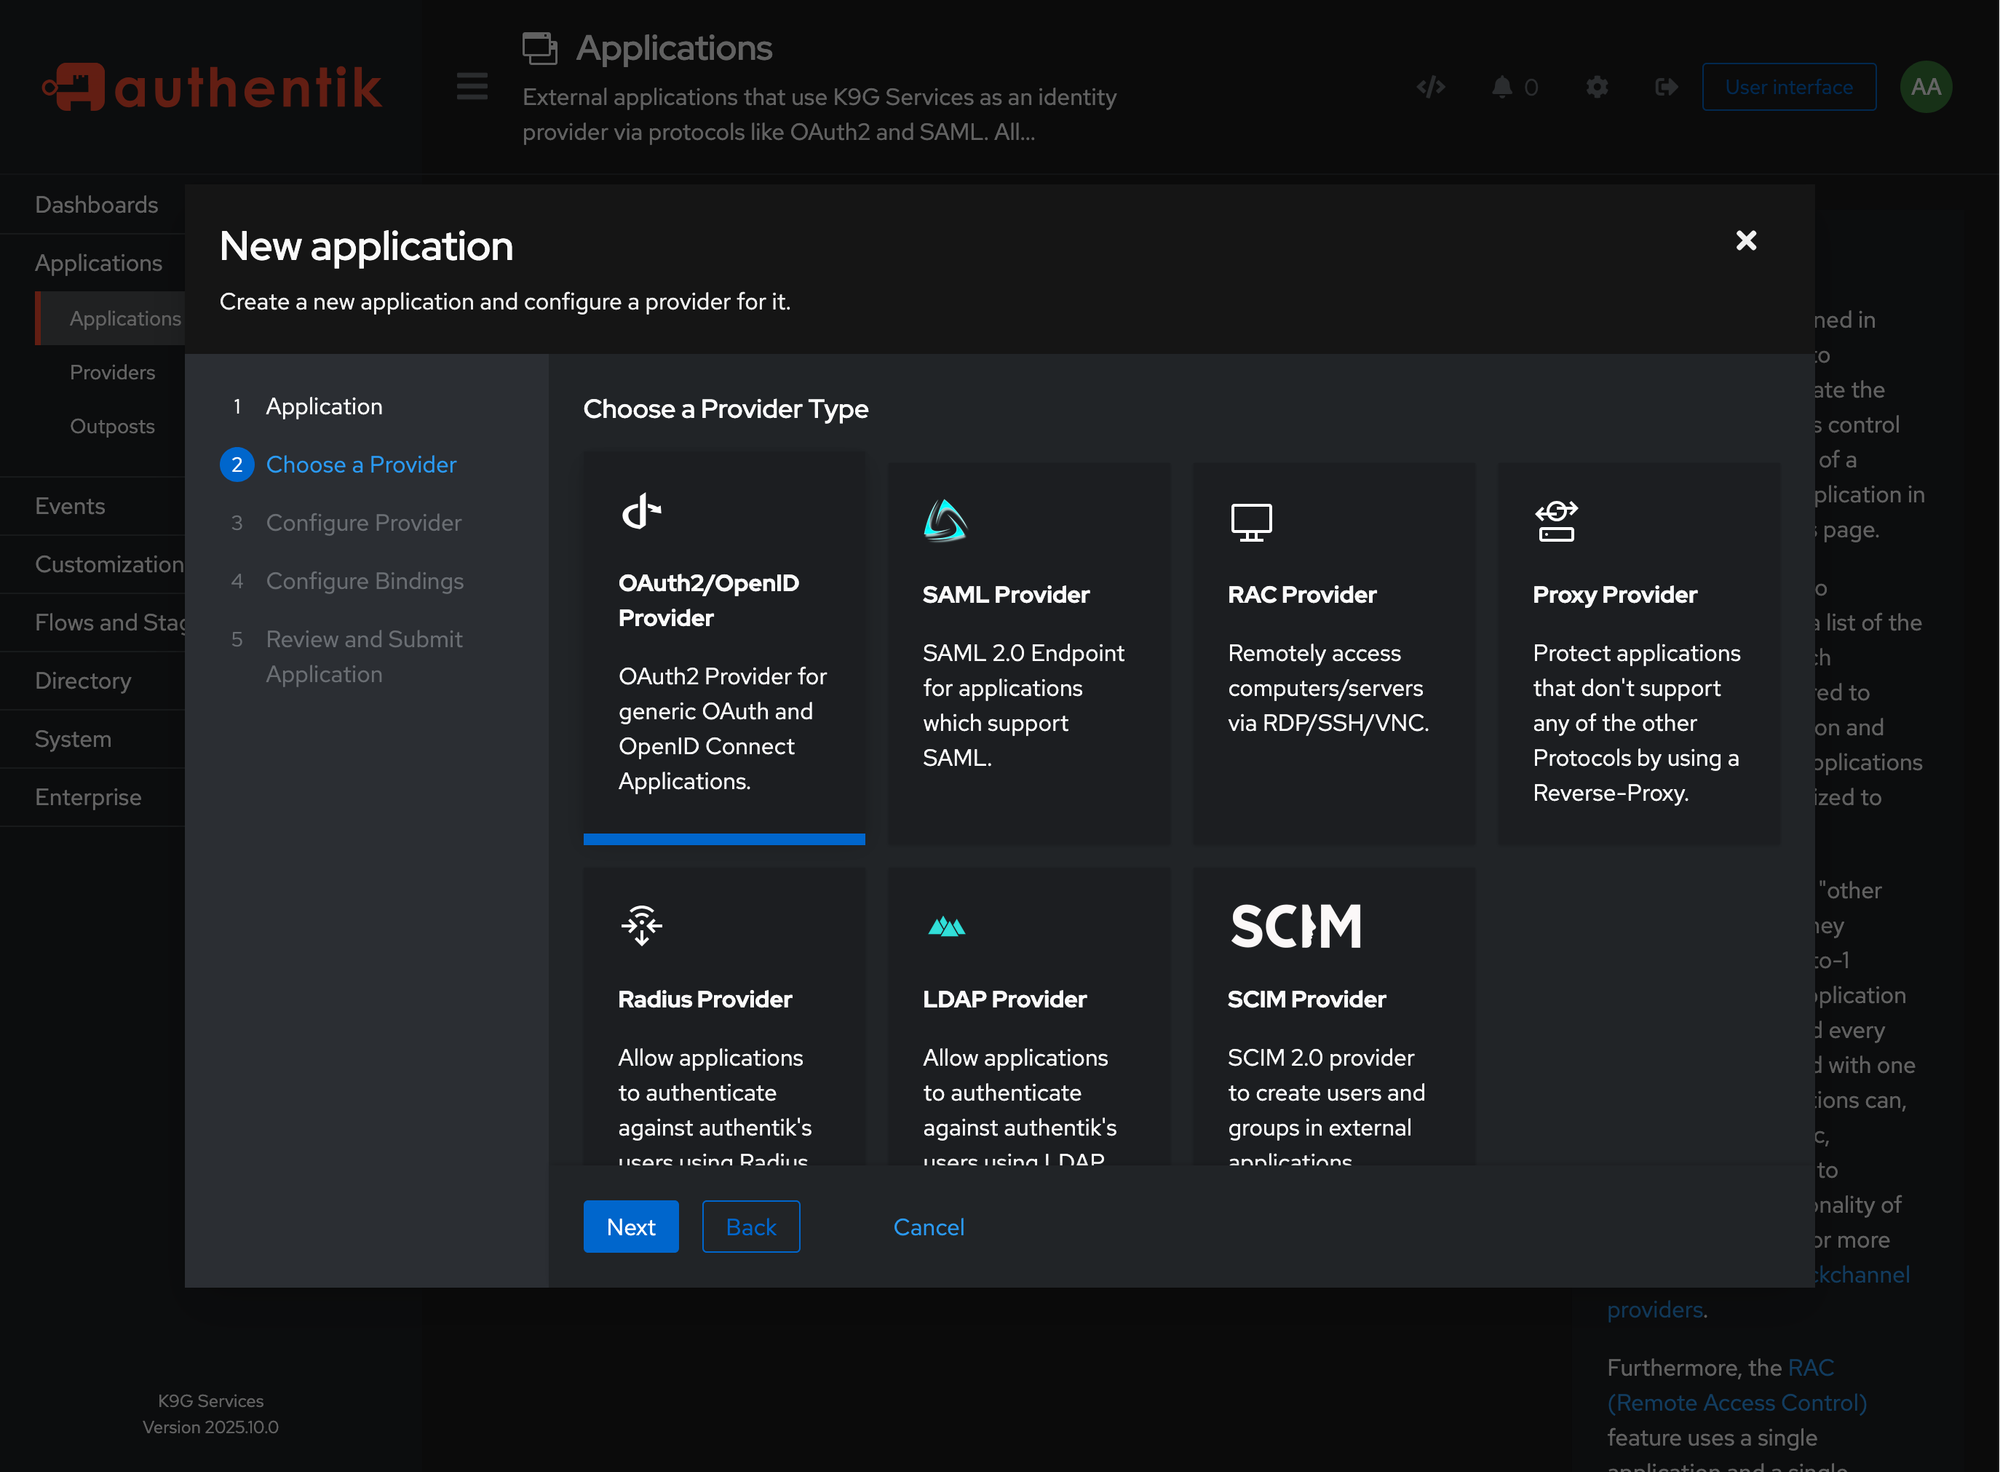
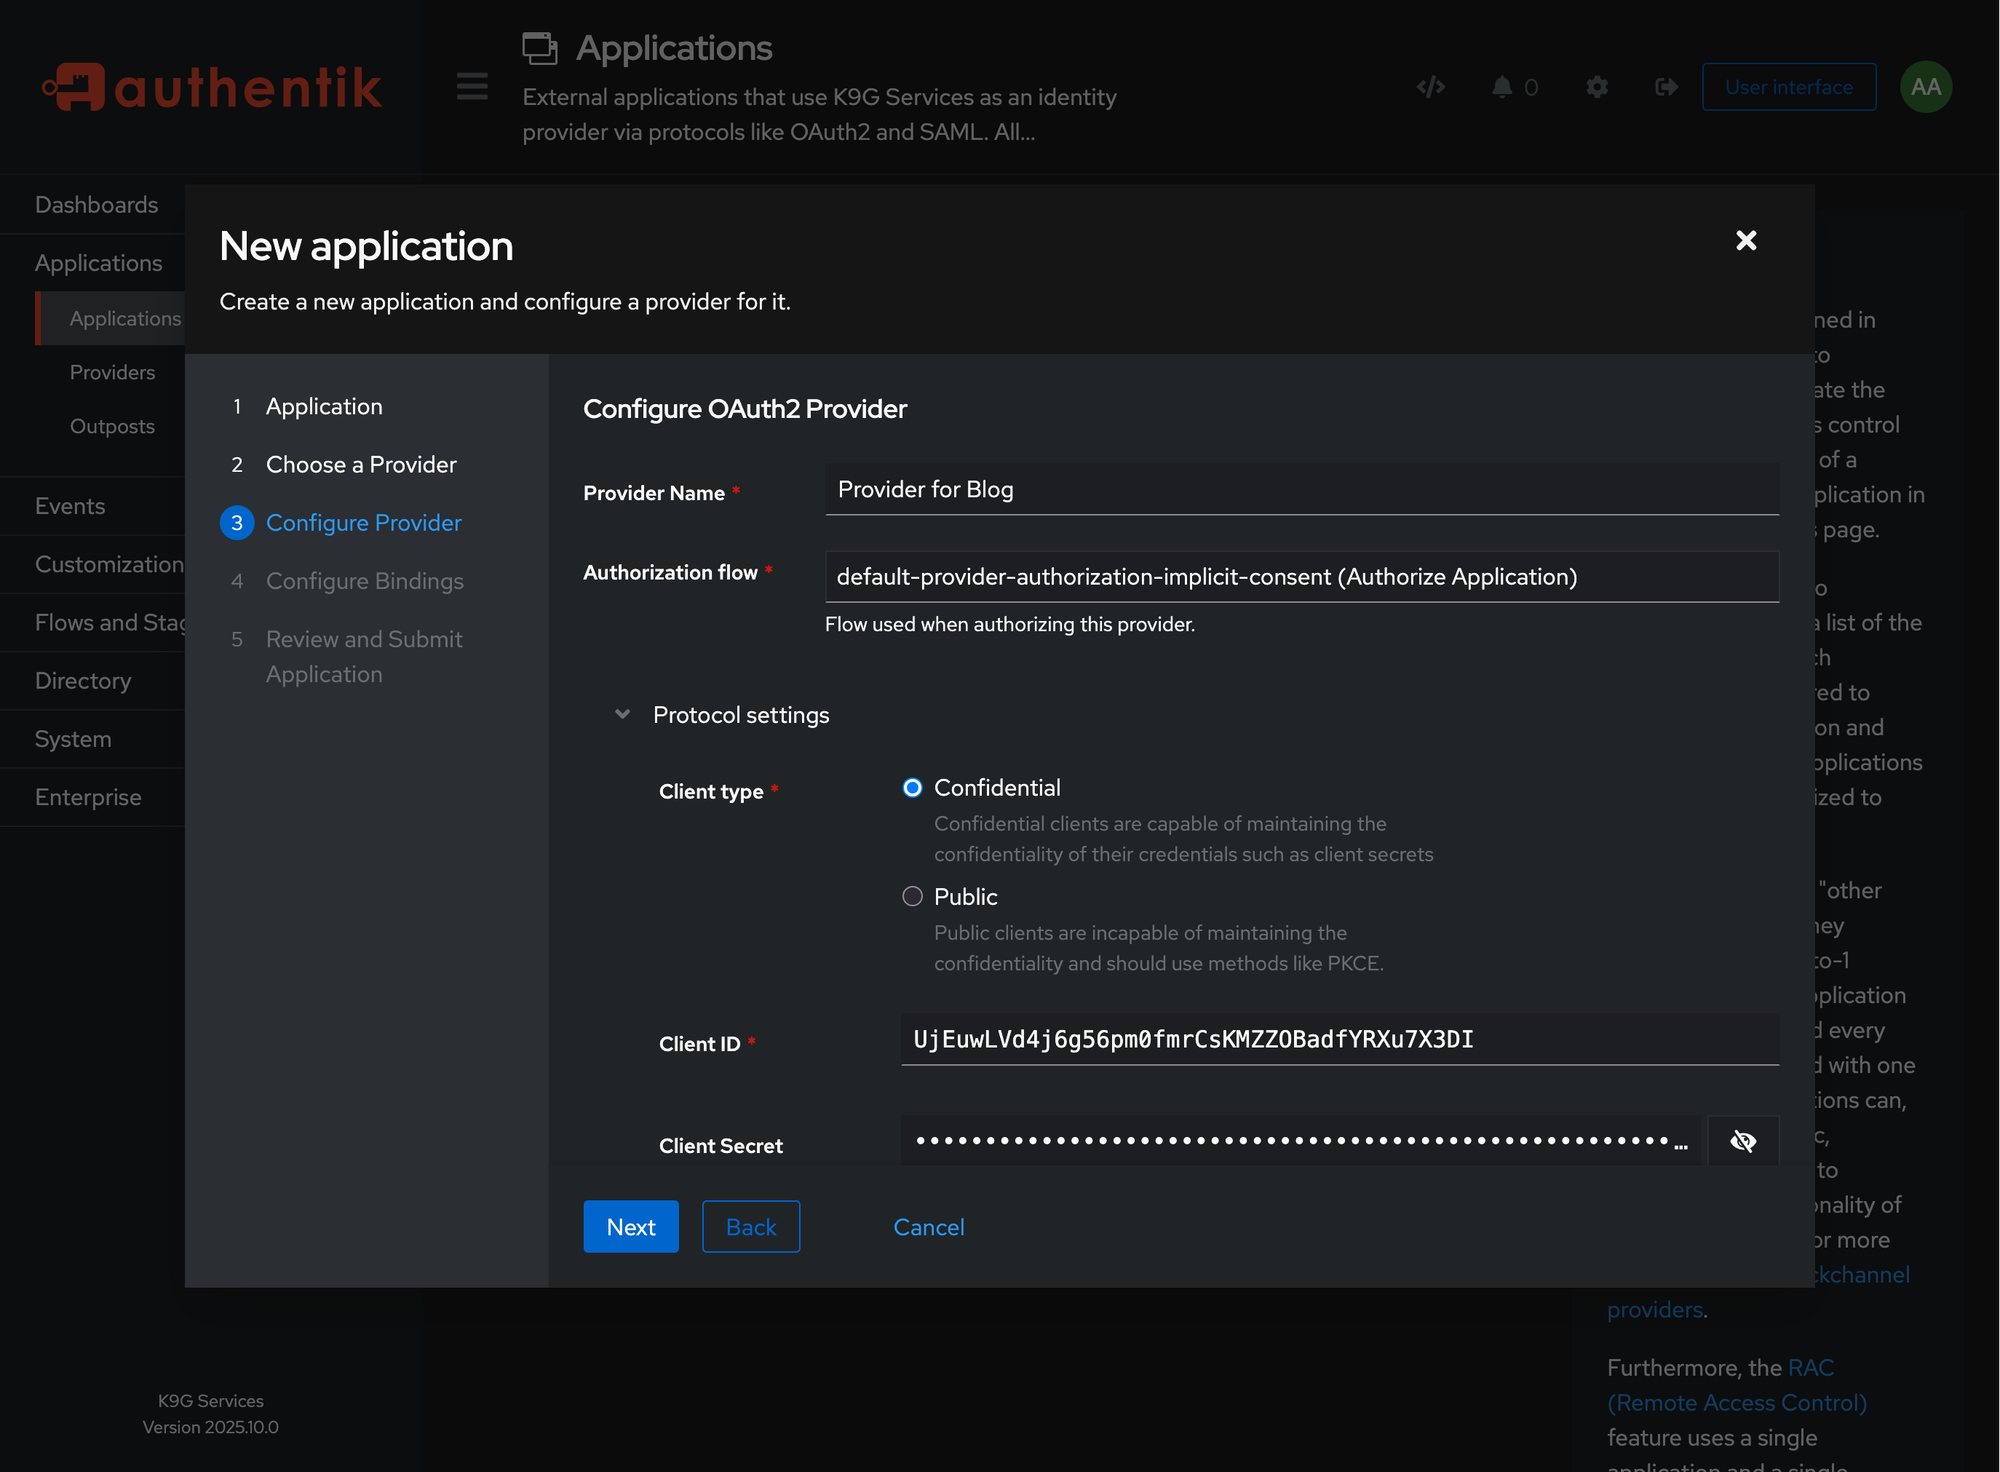
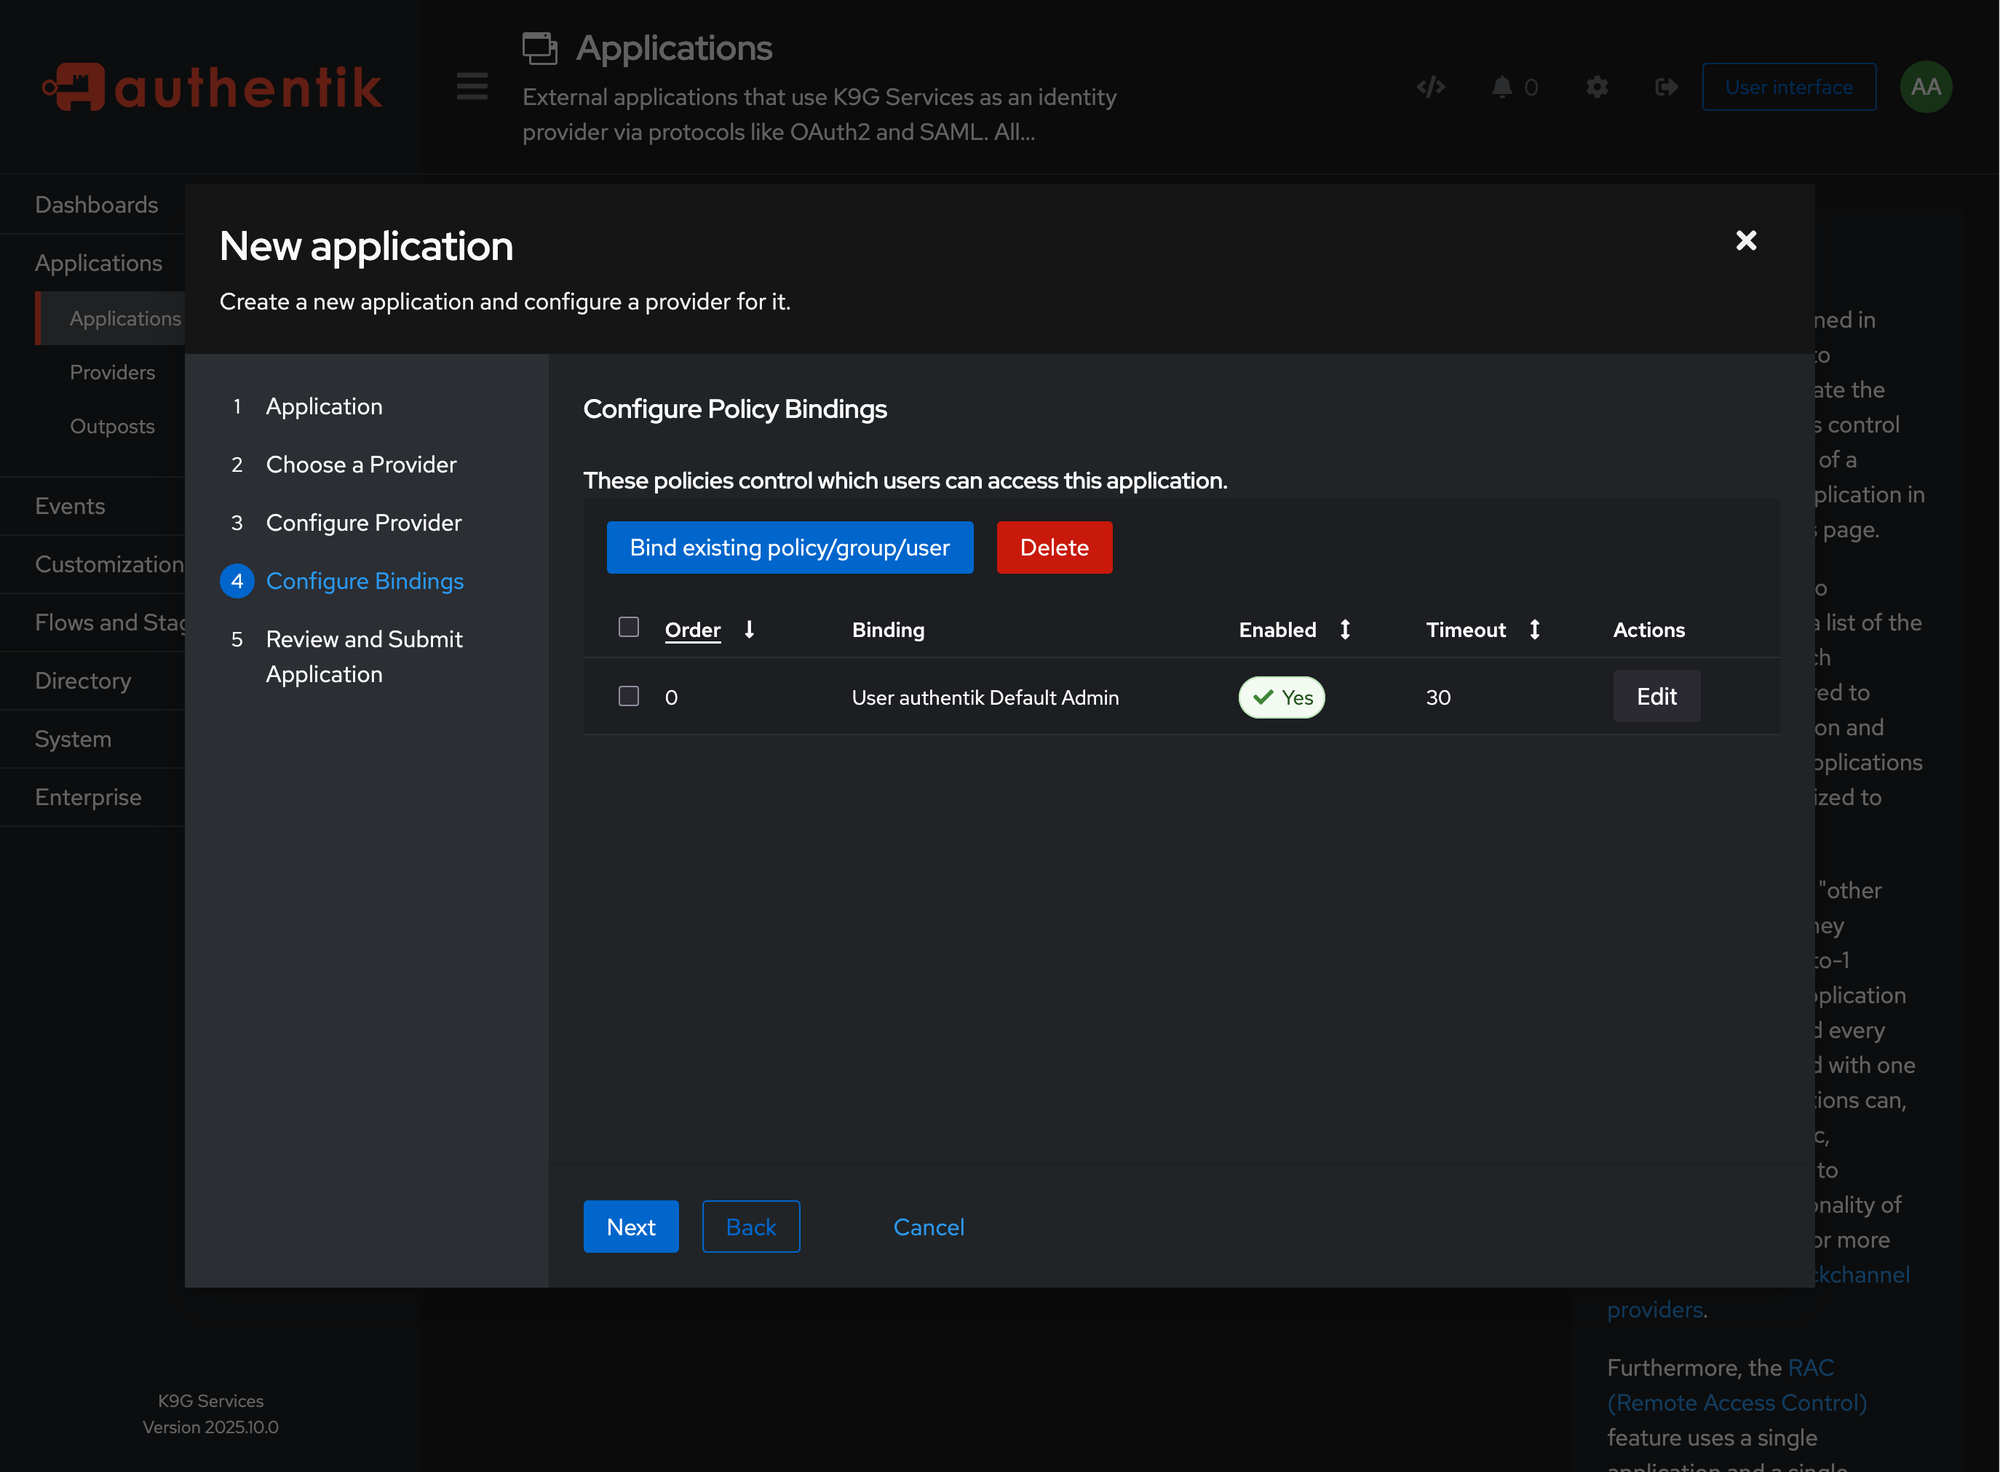
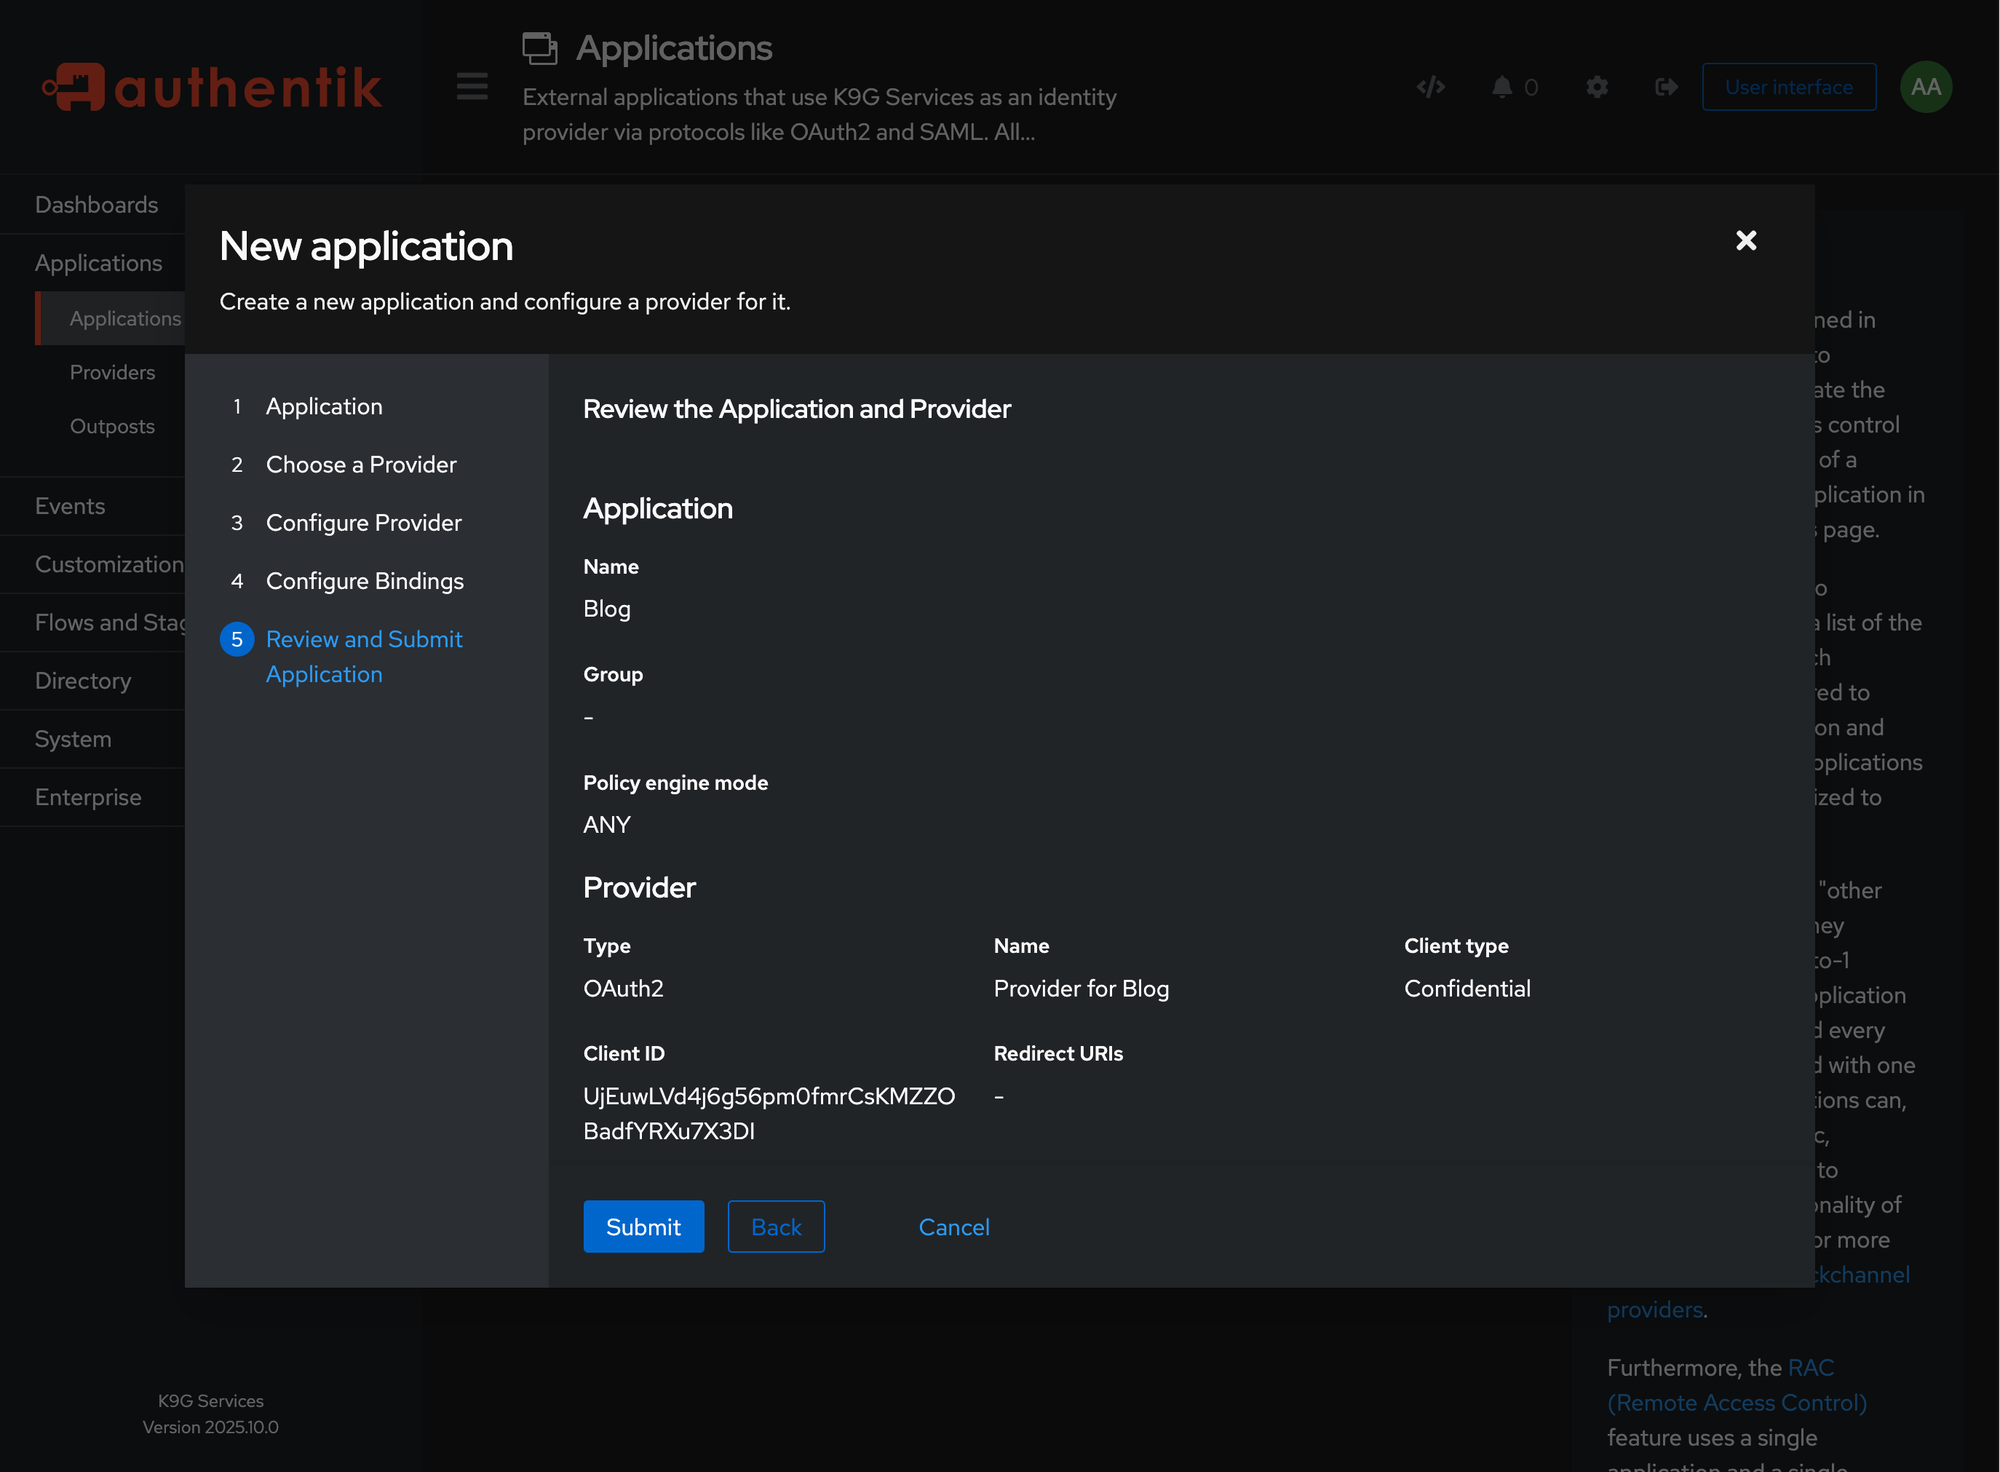
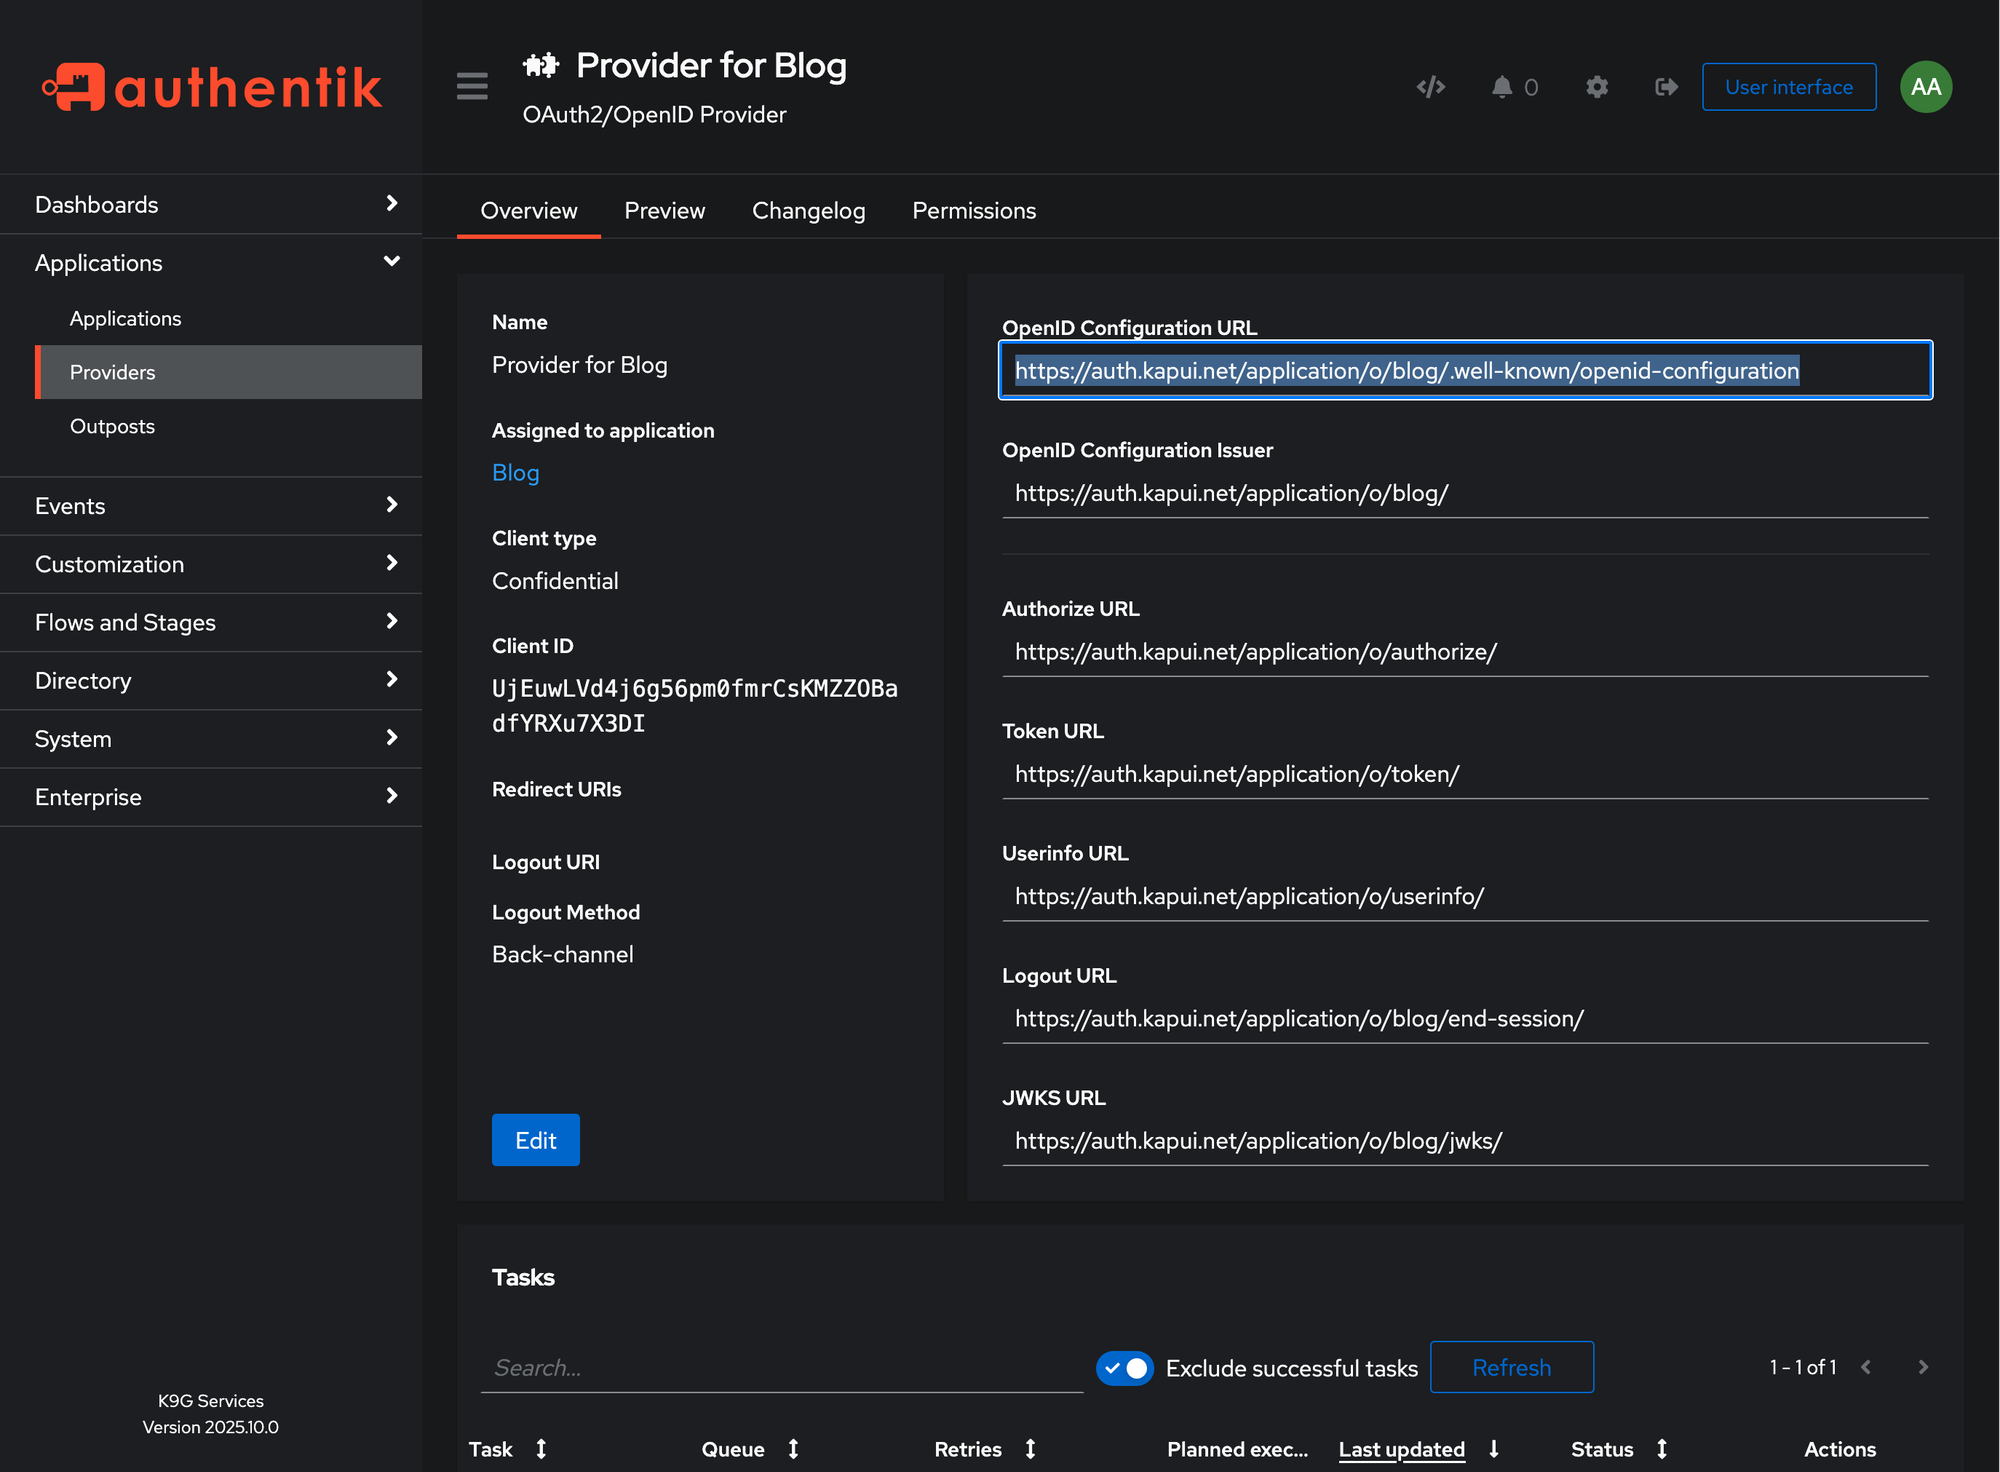
Then, just copy the OpenID Configuration URL and other necessary fields into the config of the service we want to set up to use SSO. SAML works similarly.
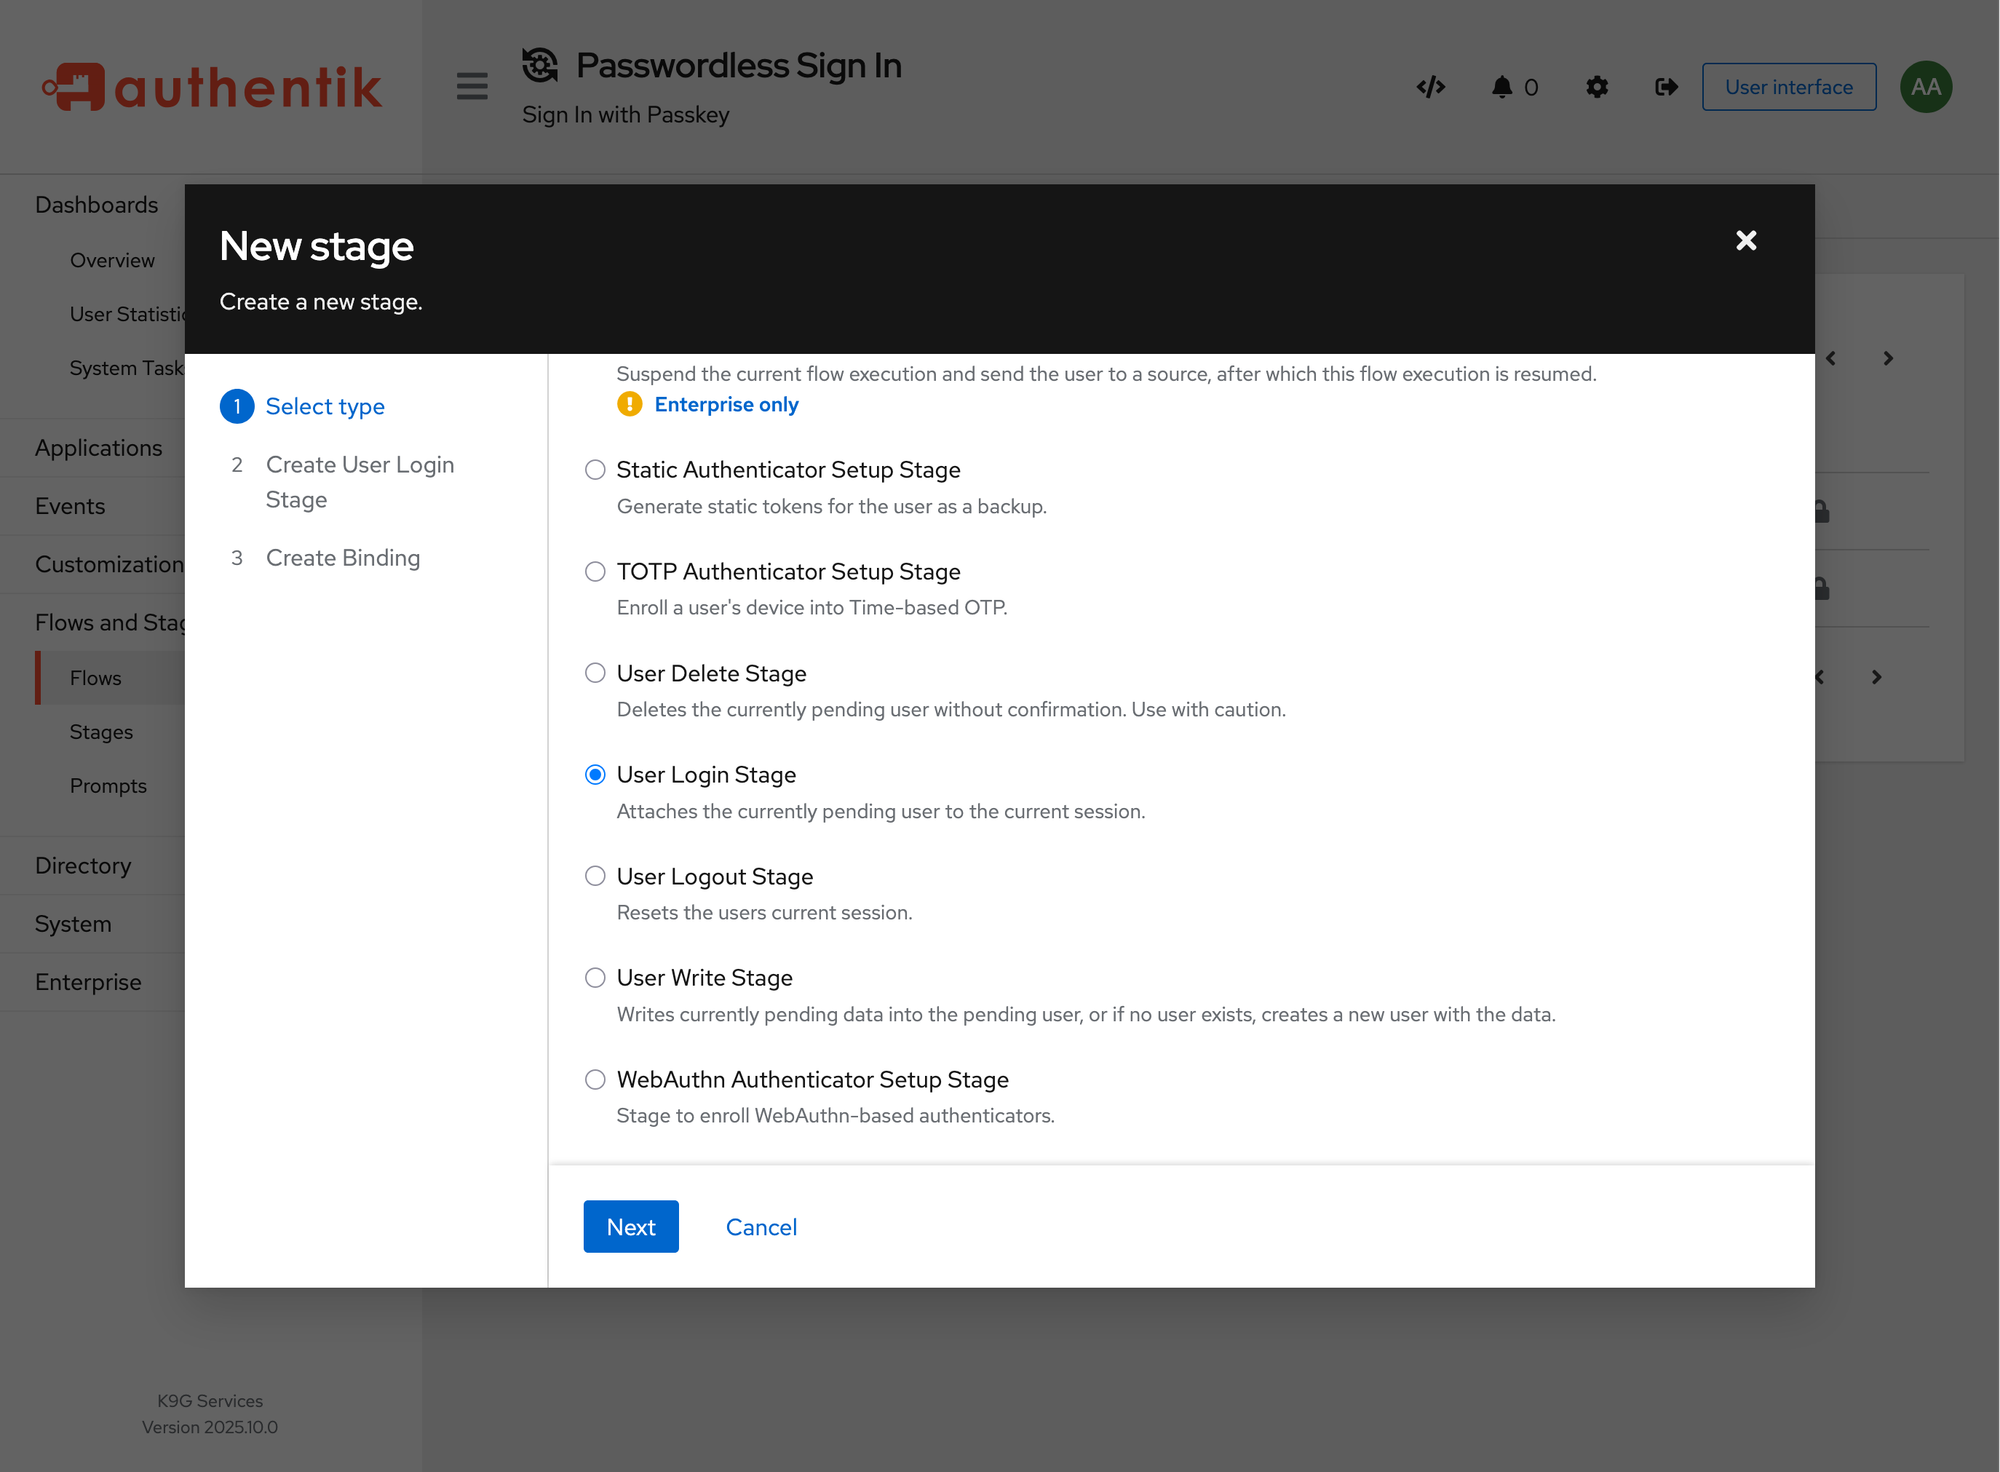
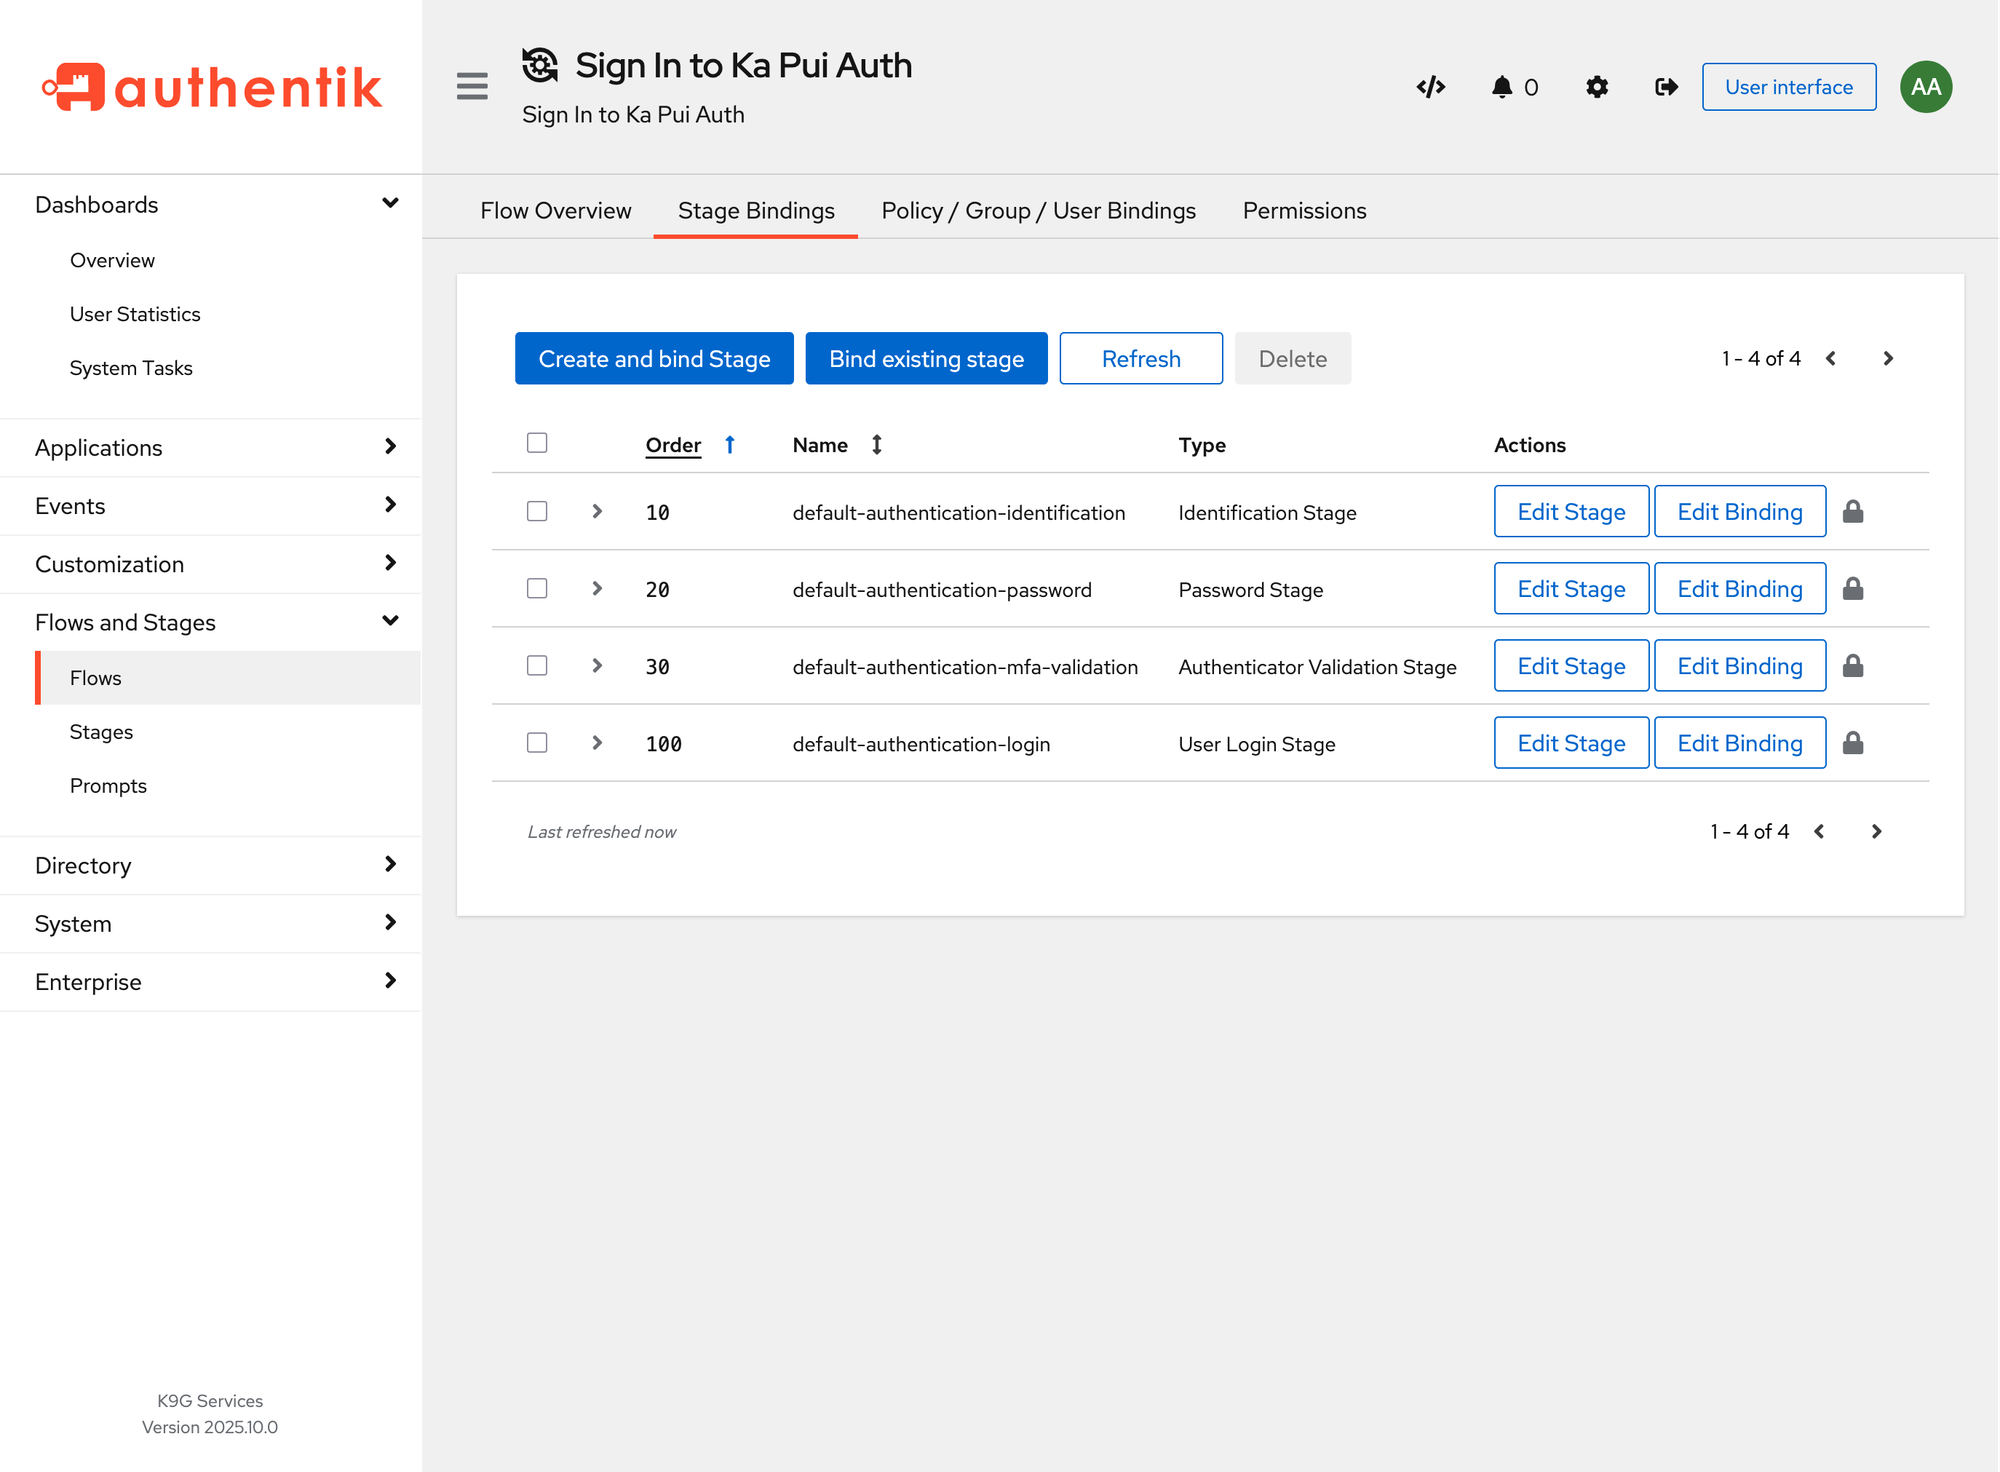
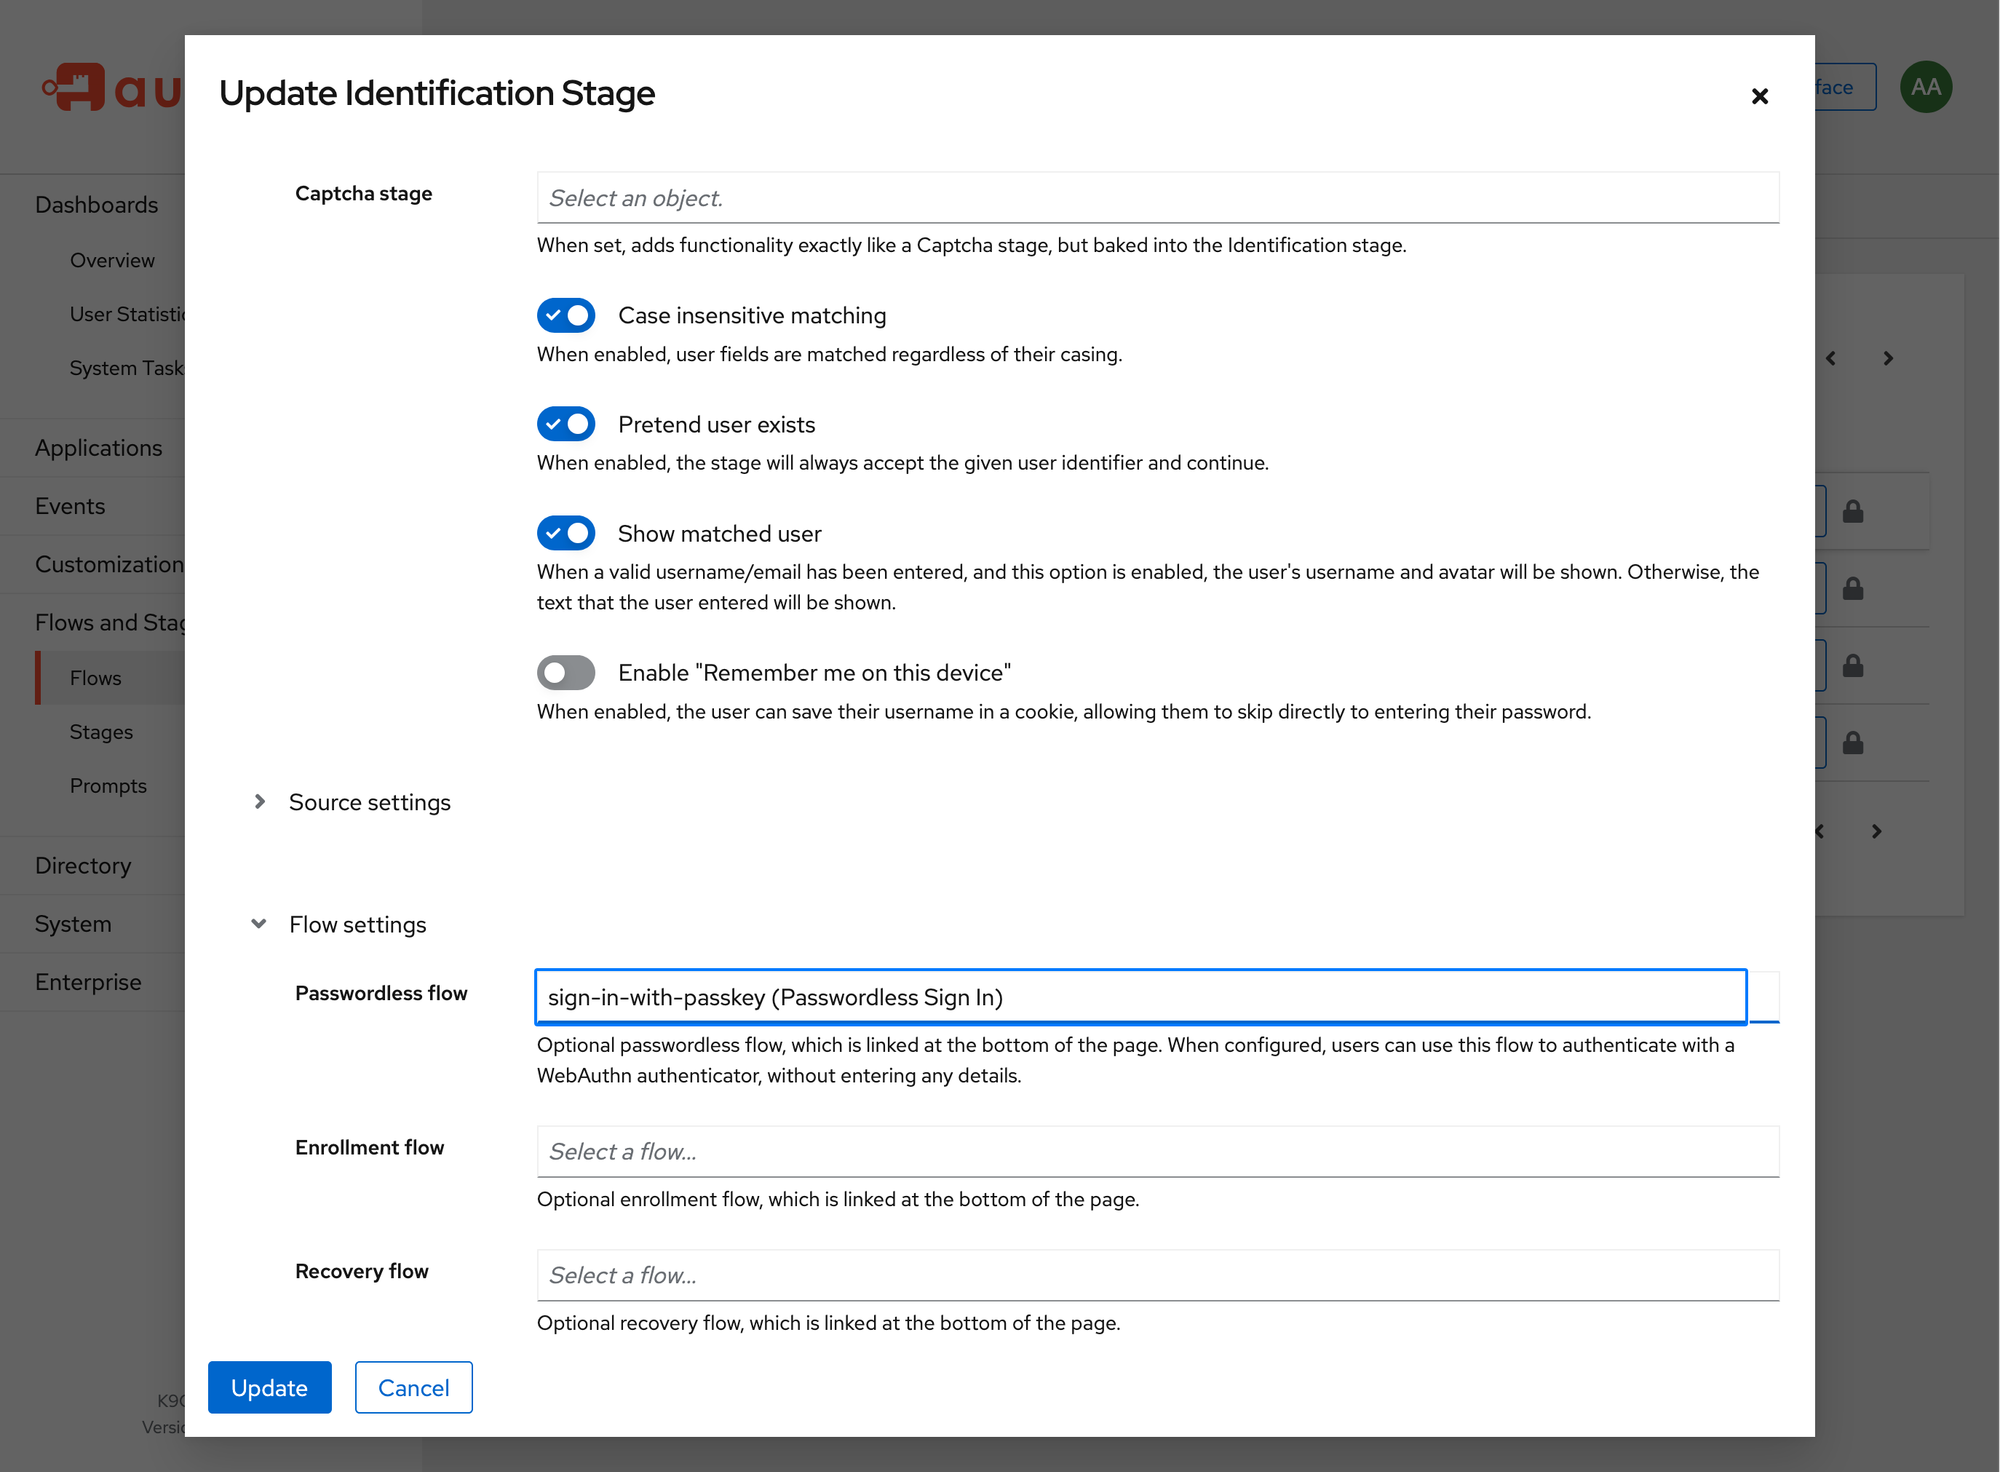
Using Passkeys
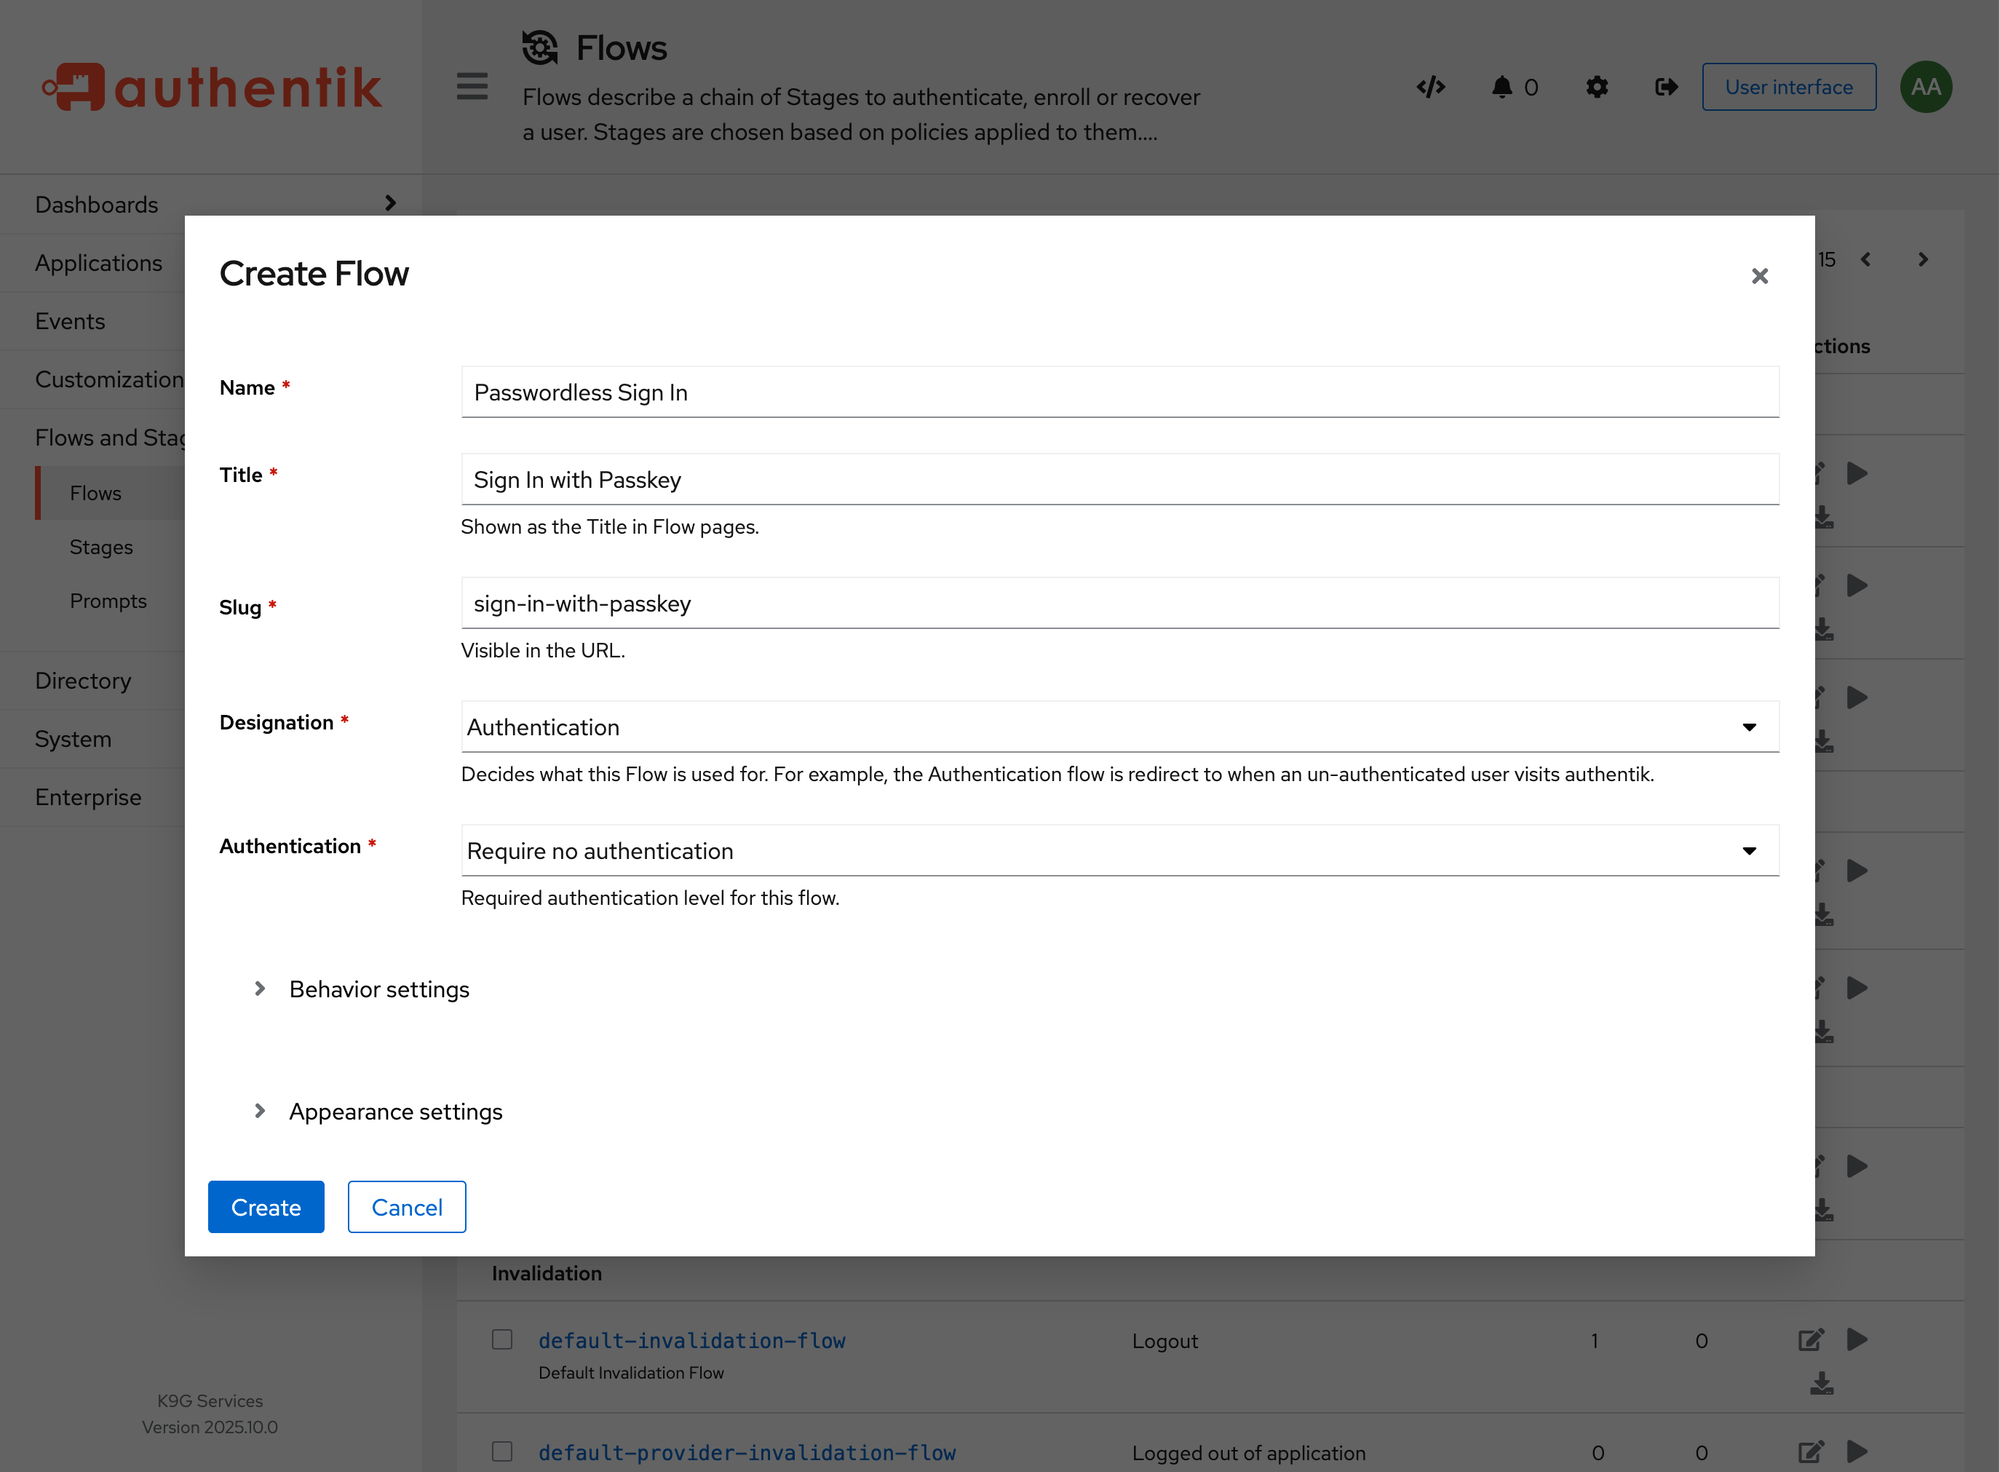
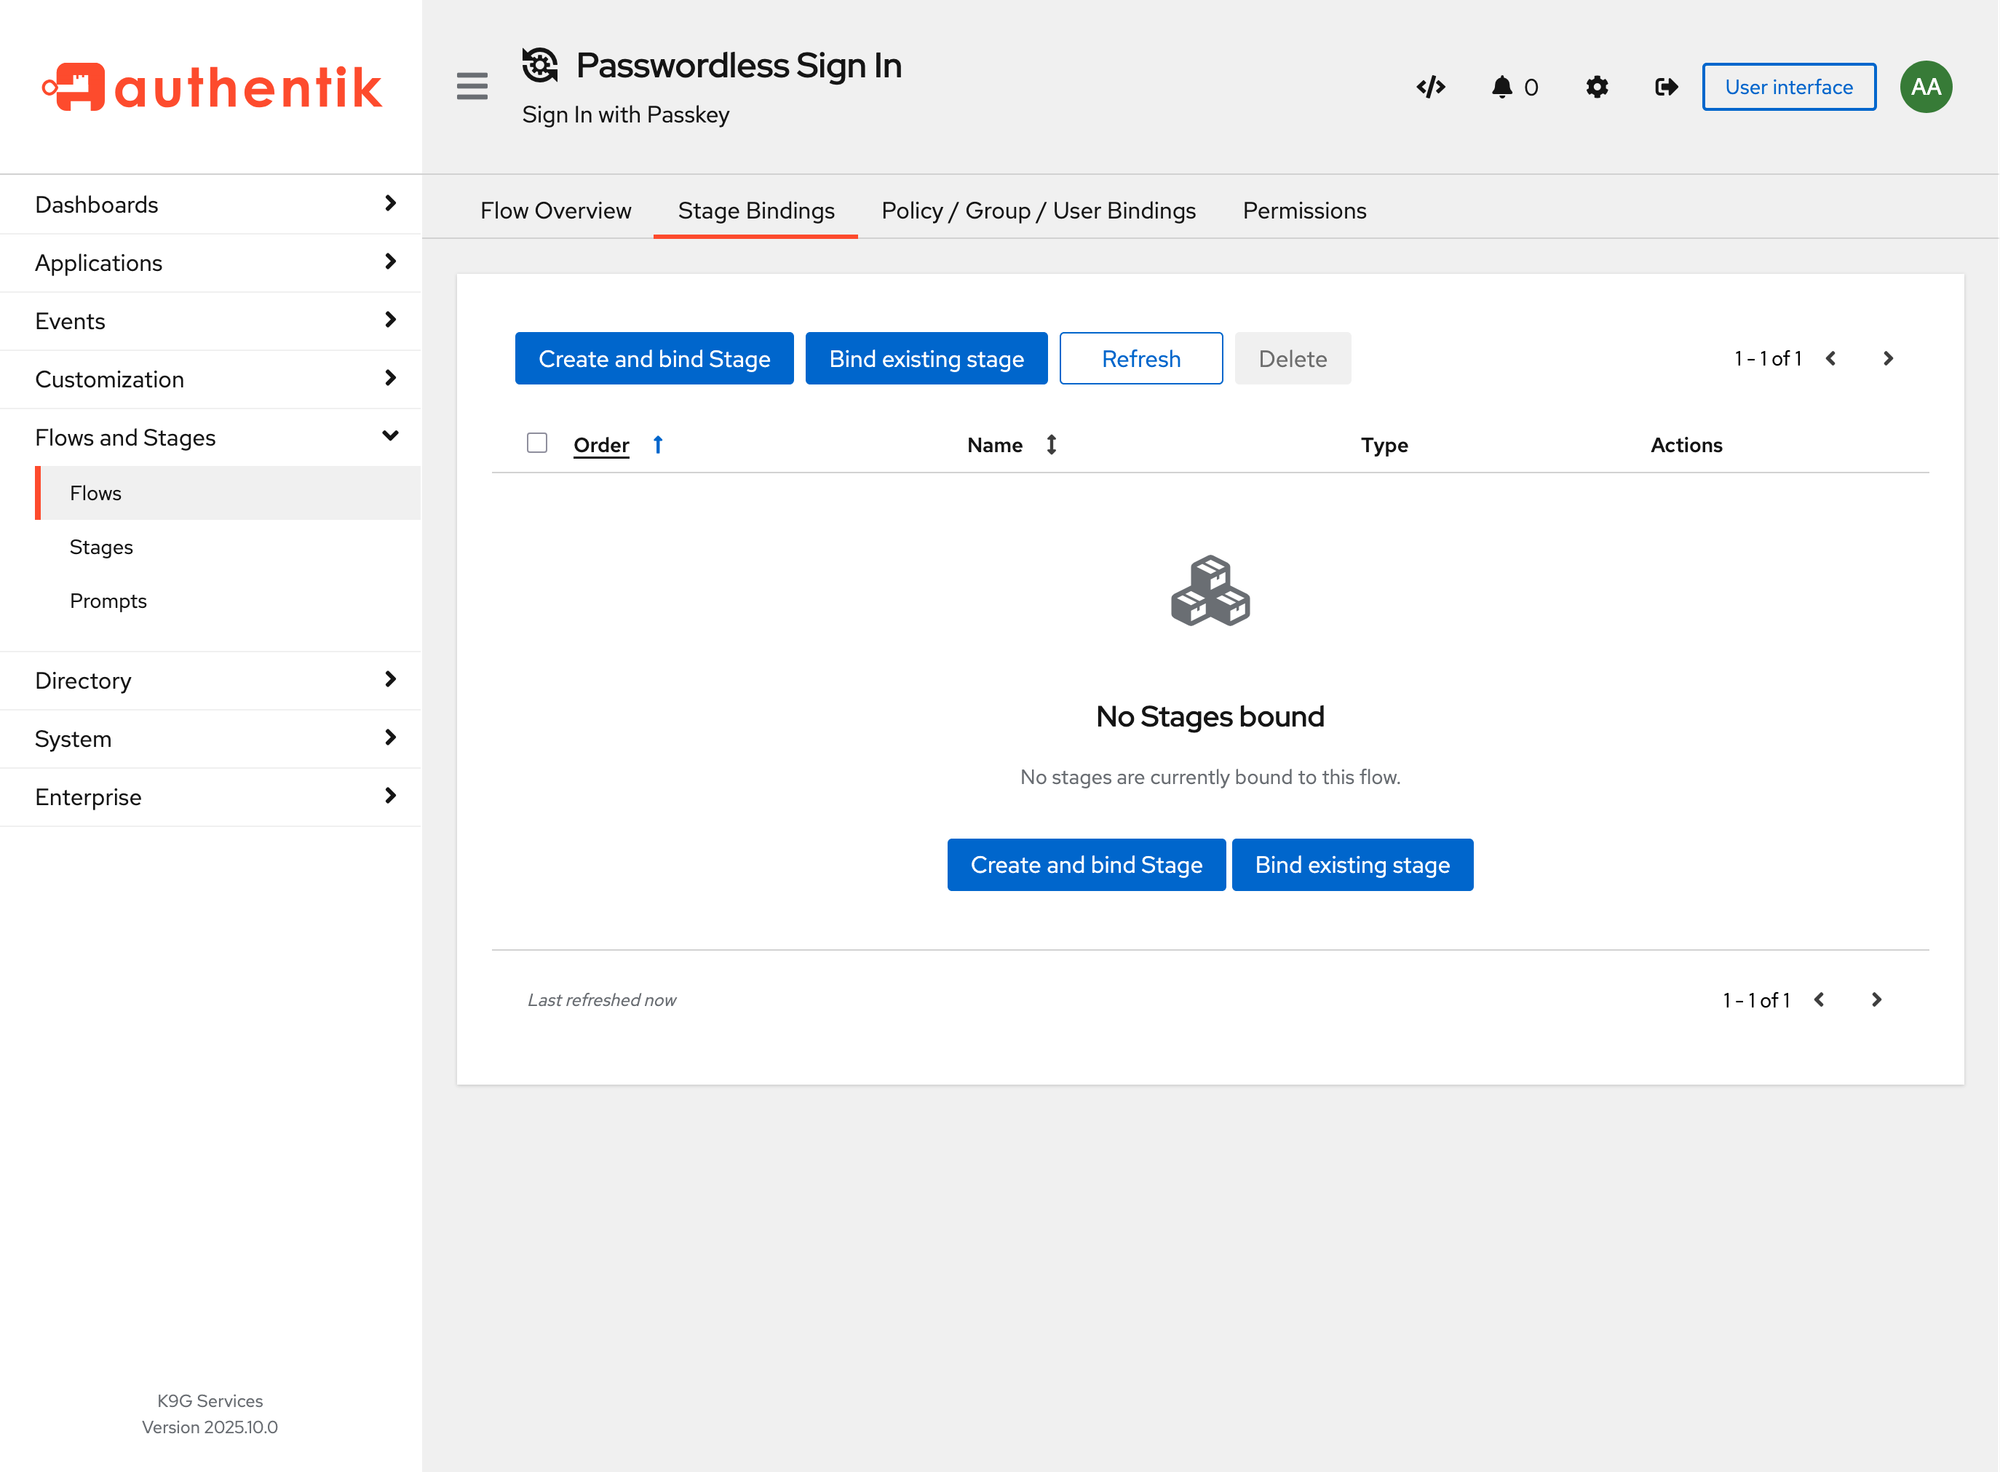
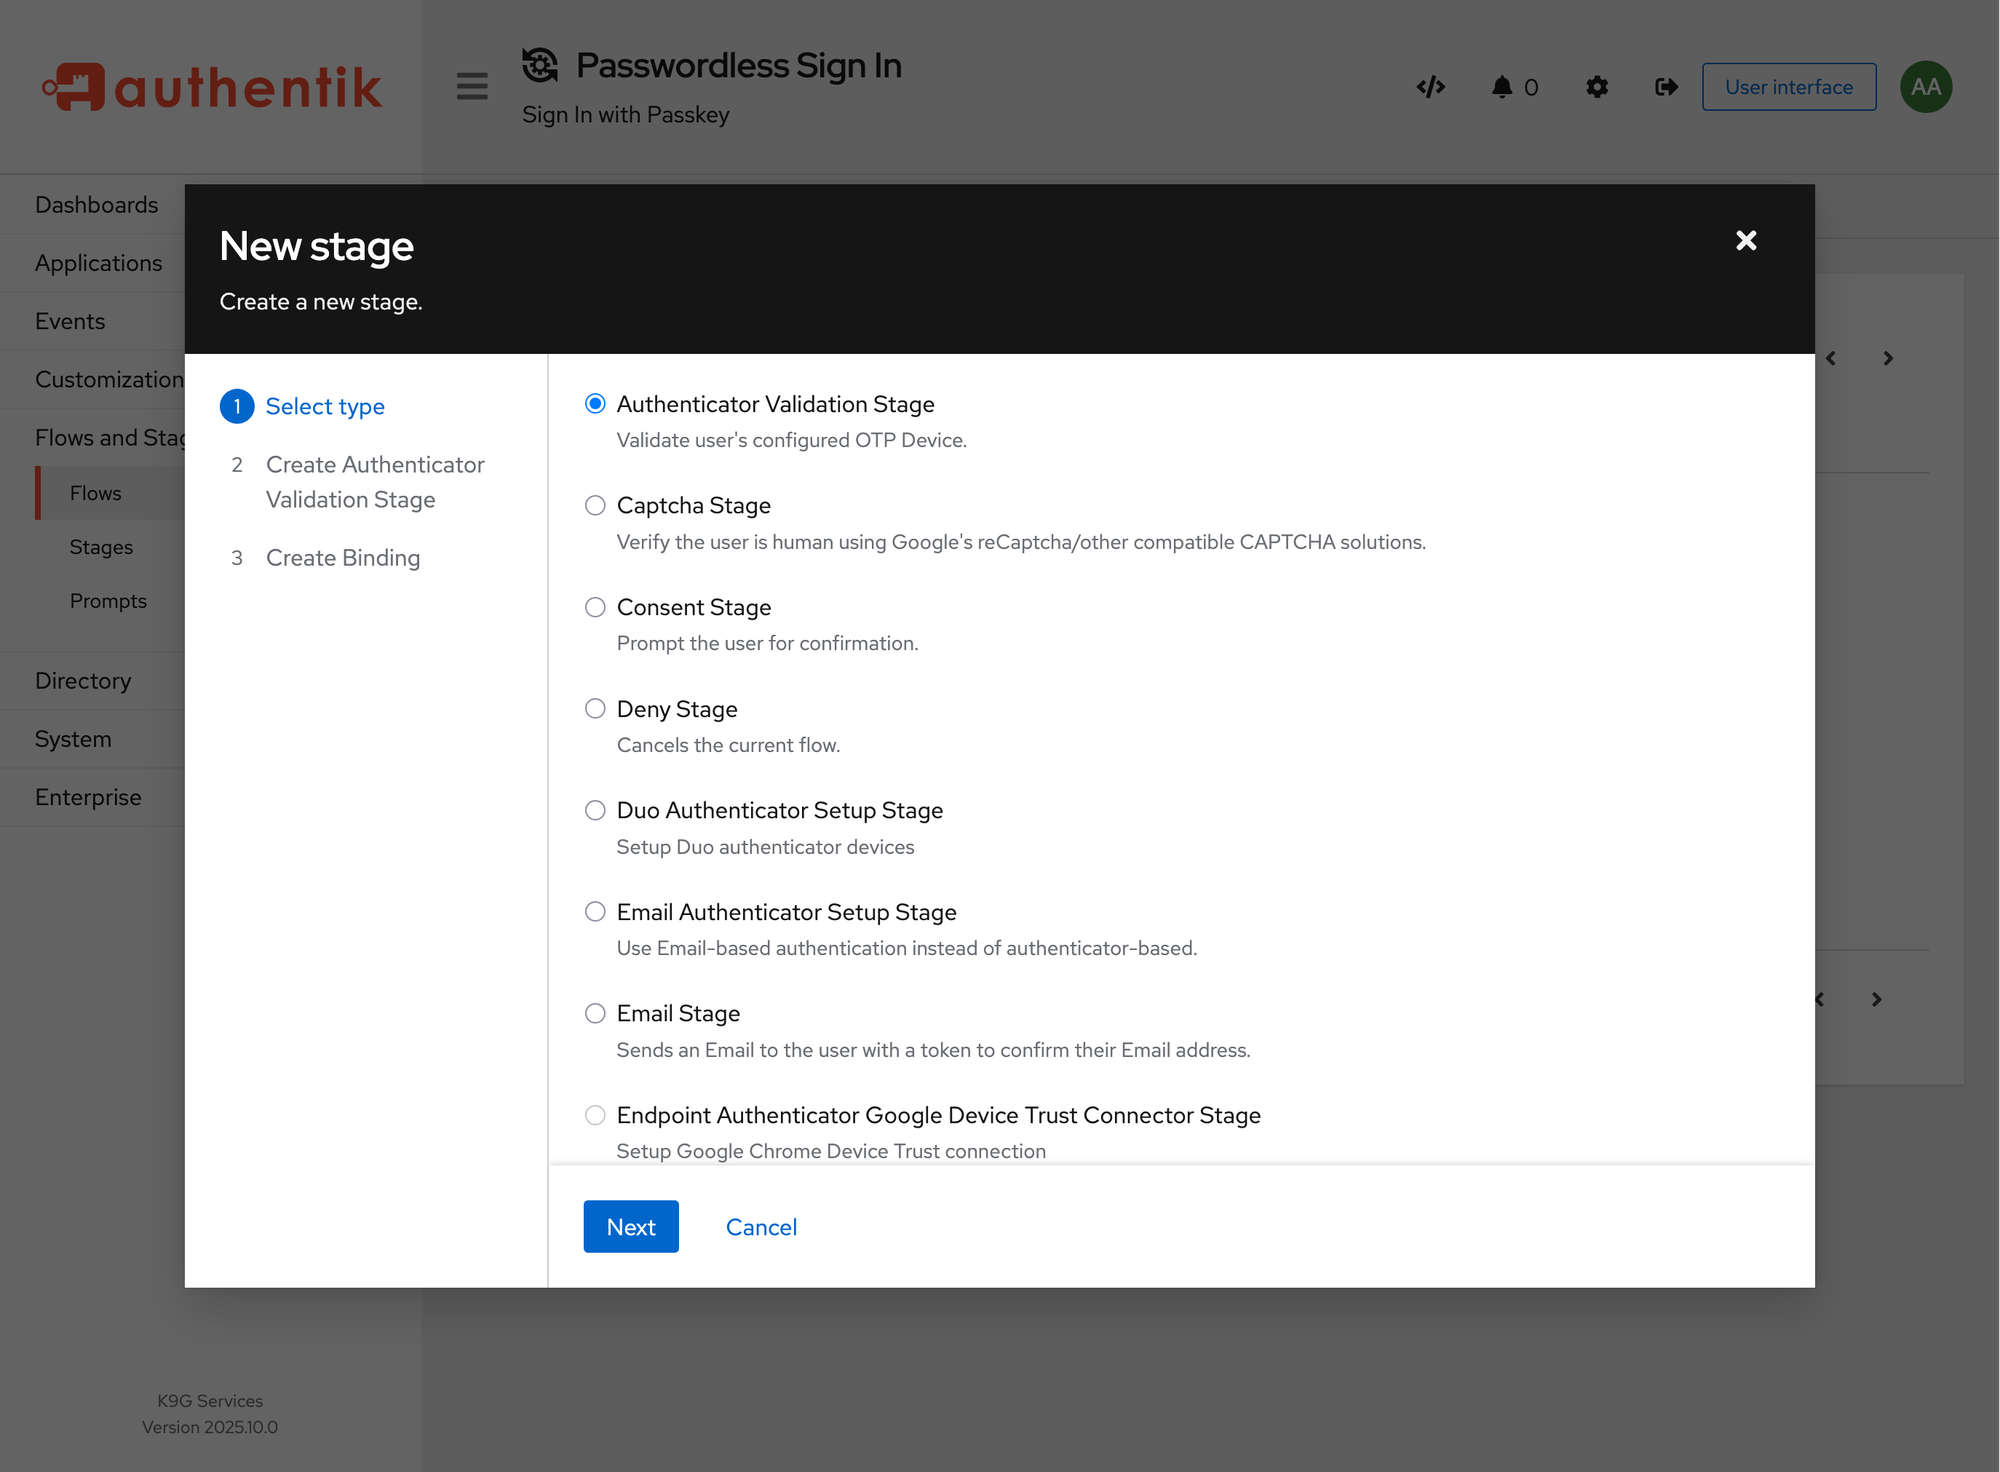
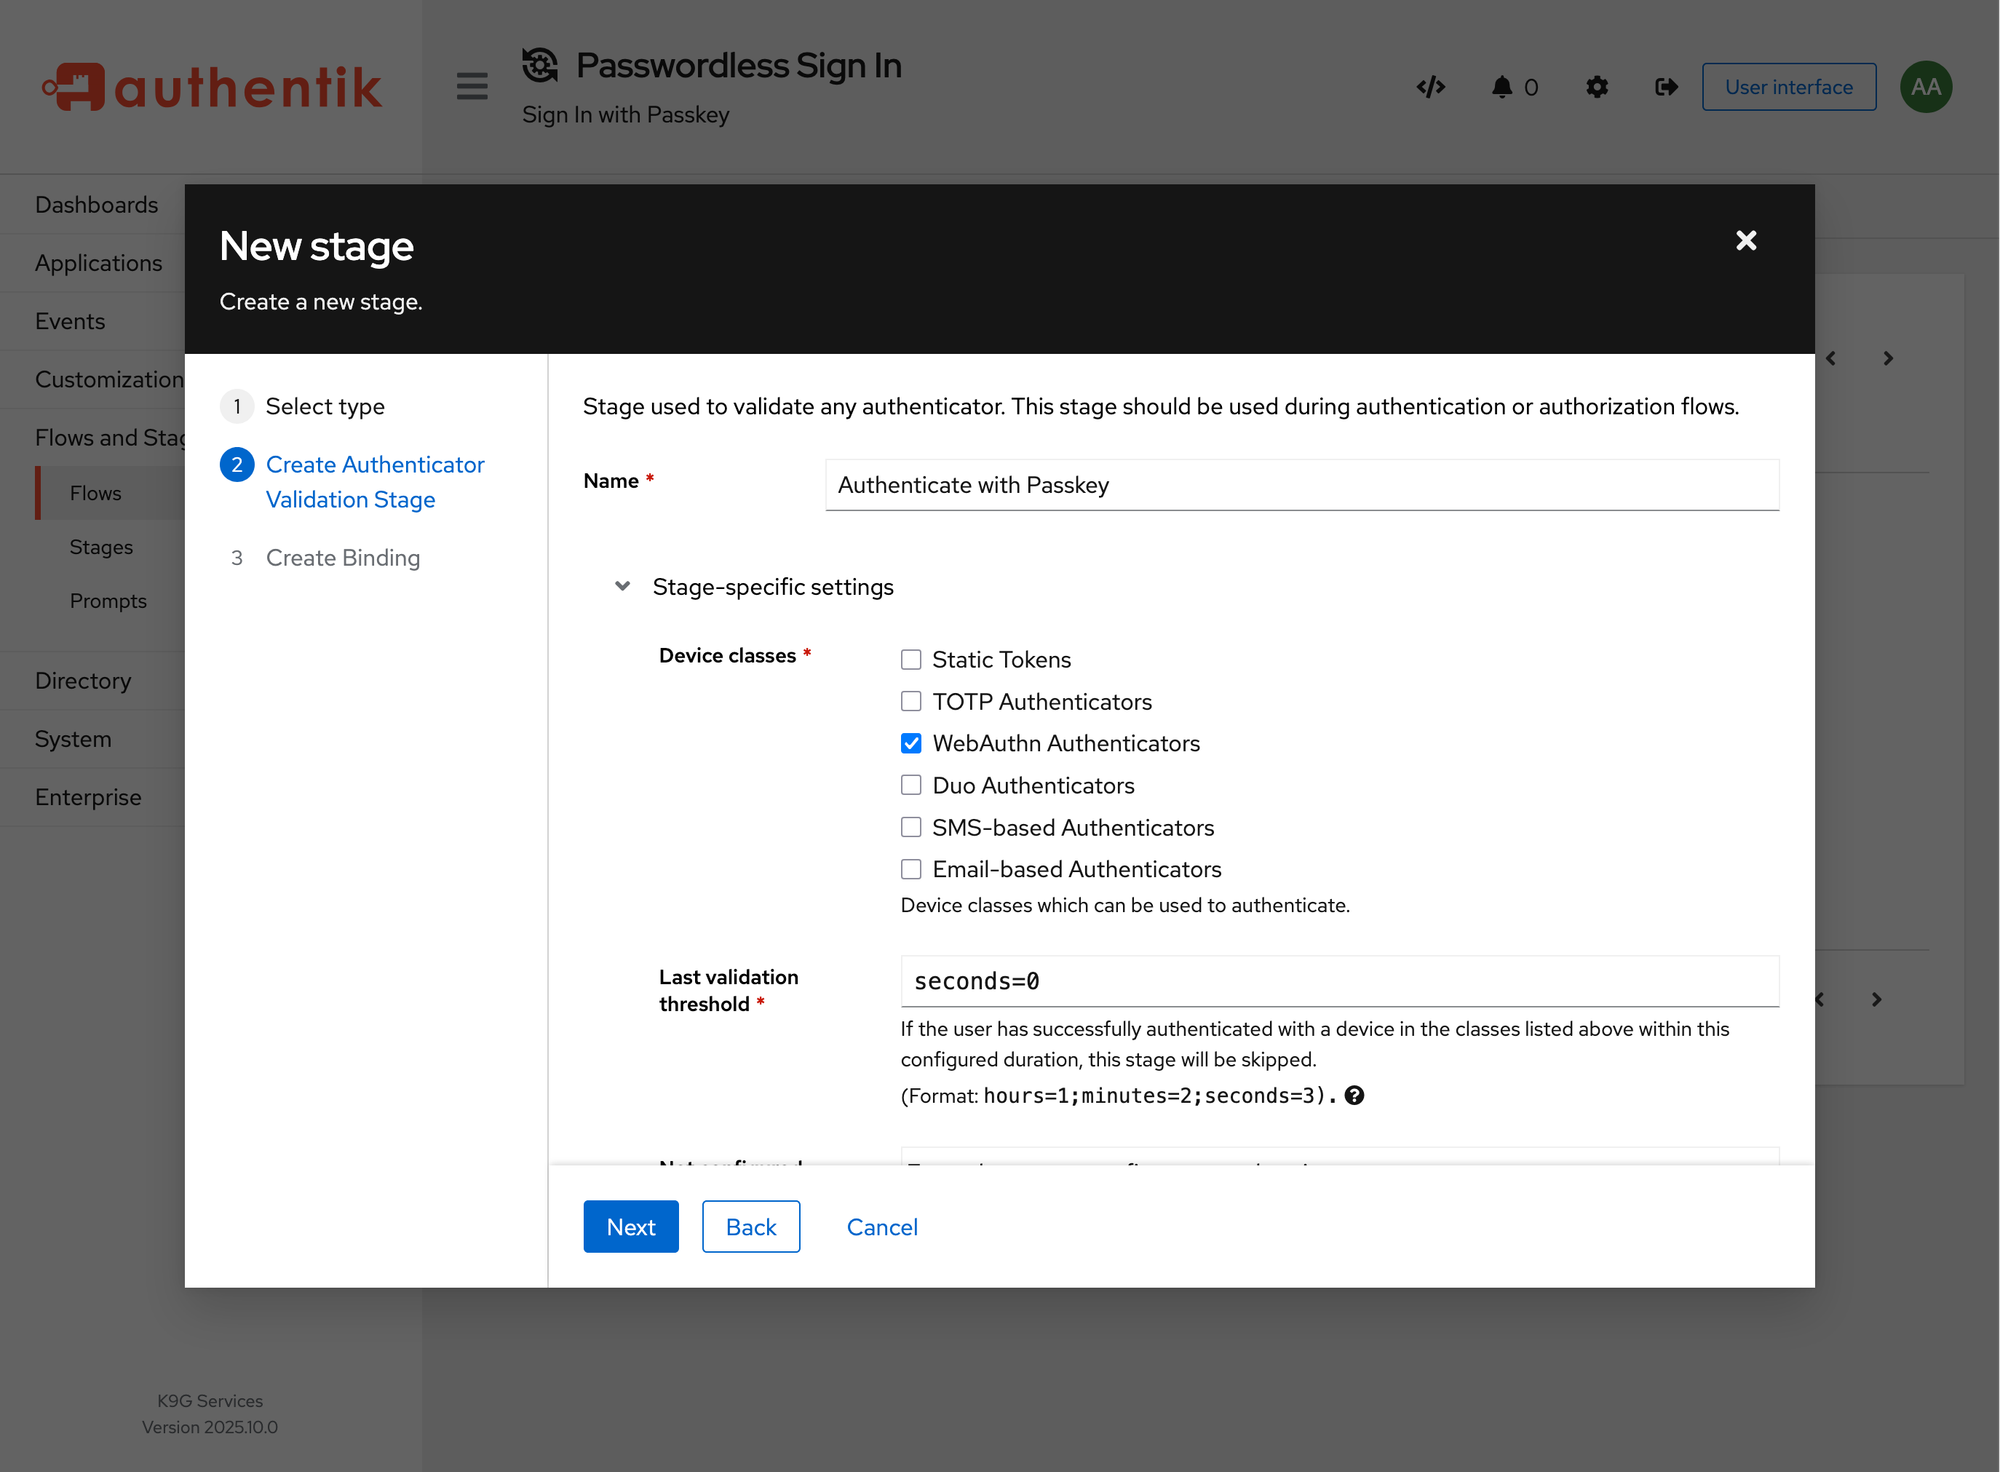
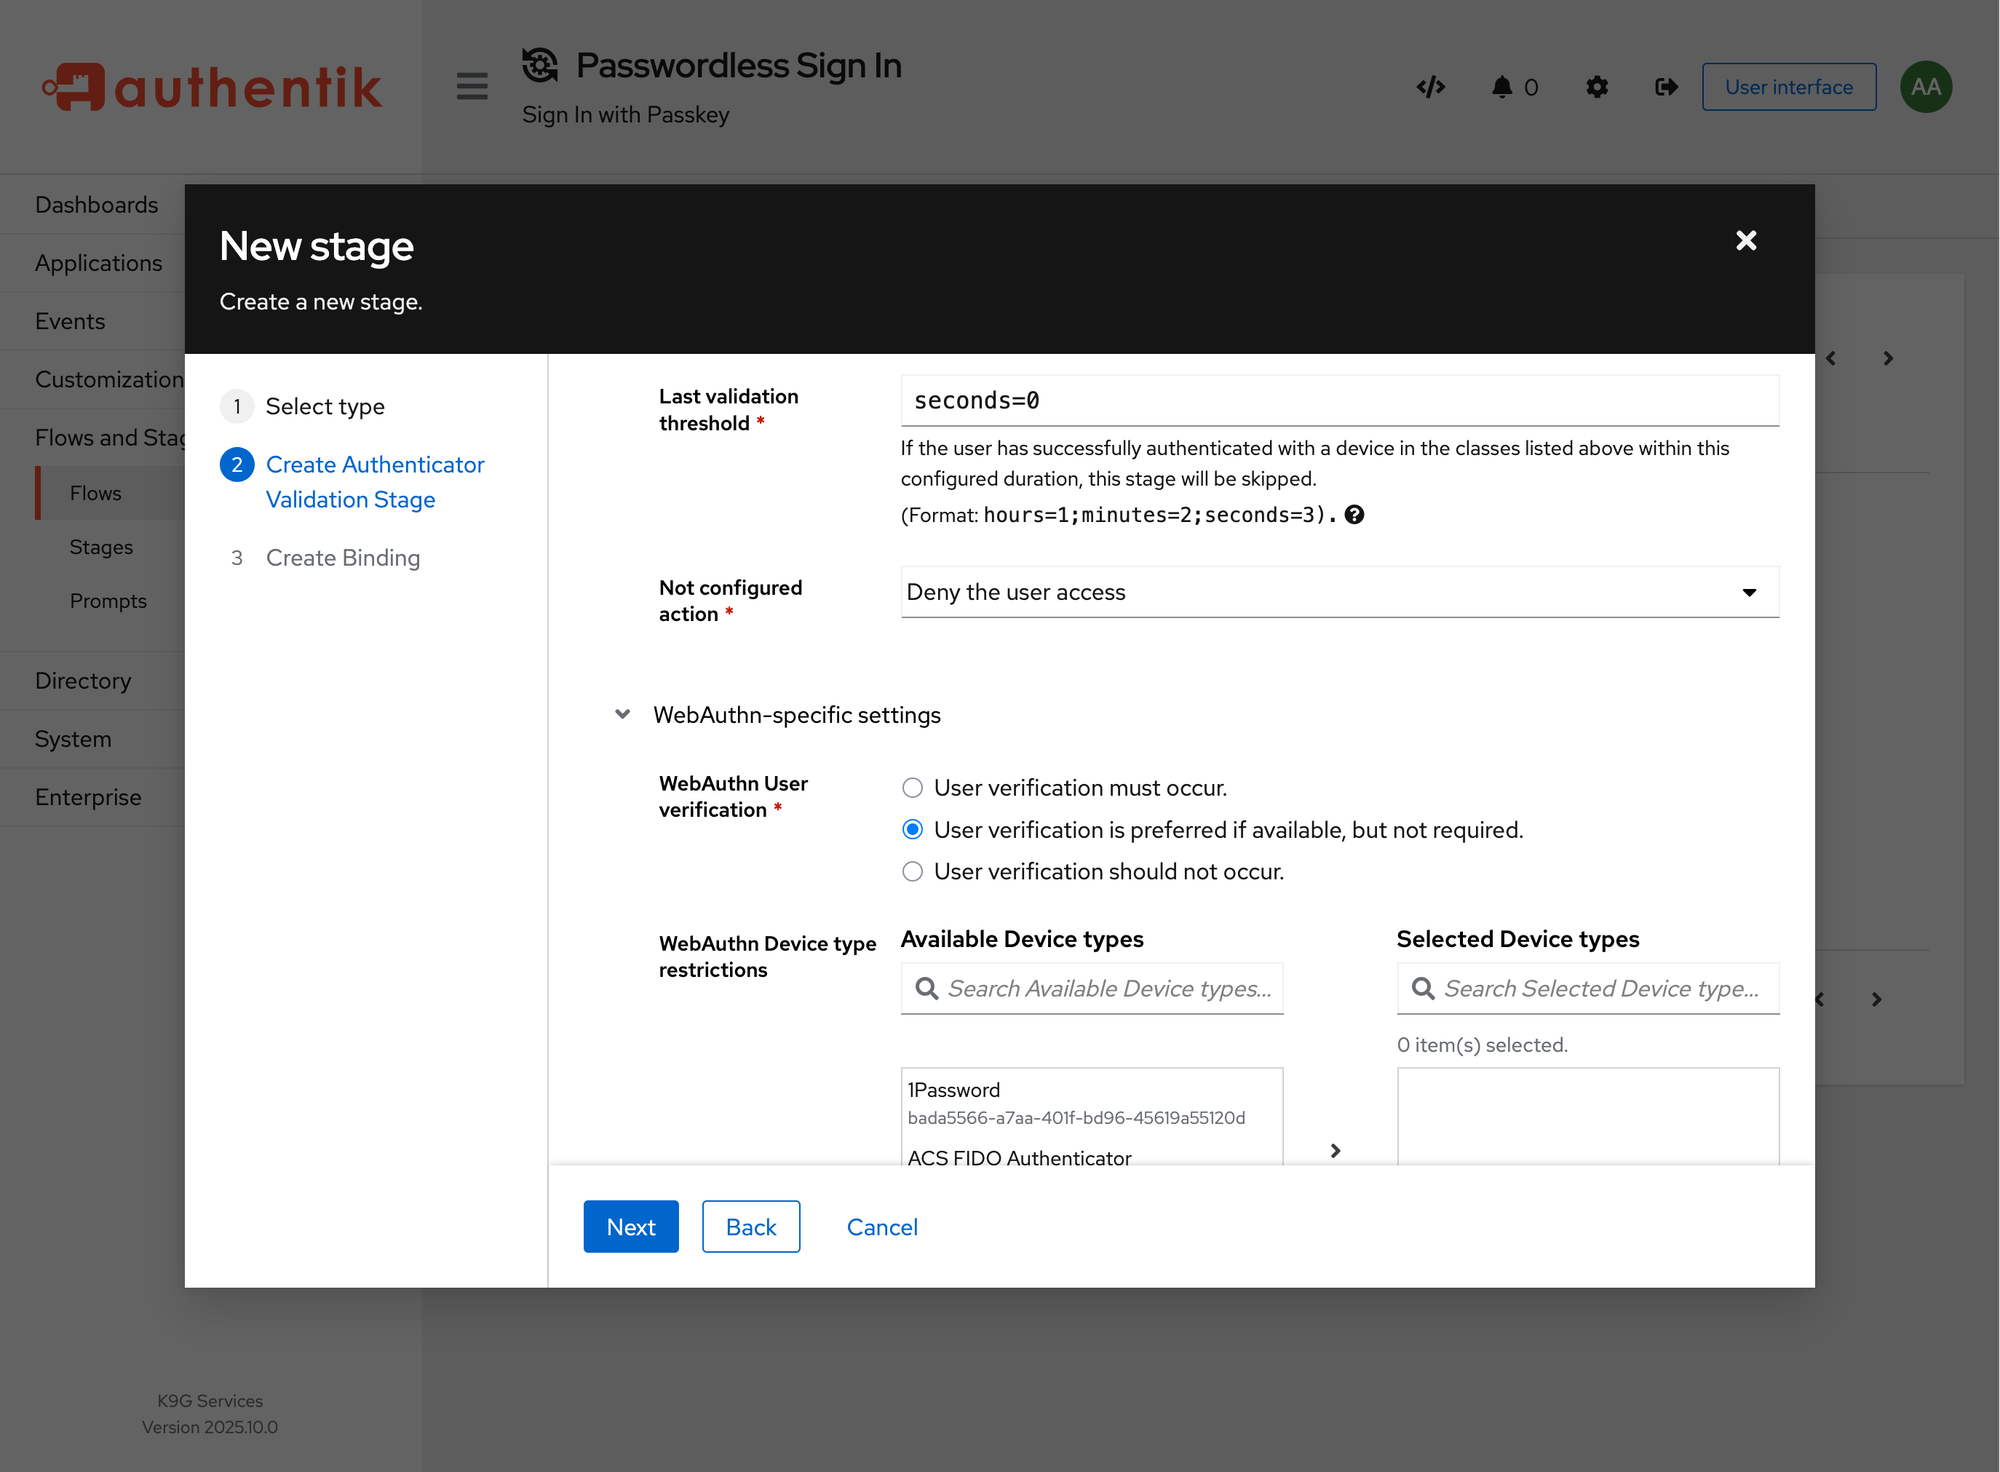
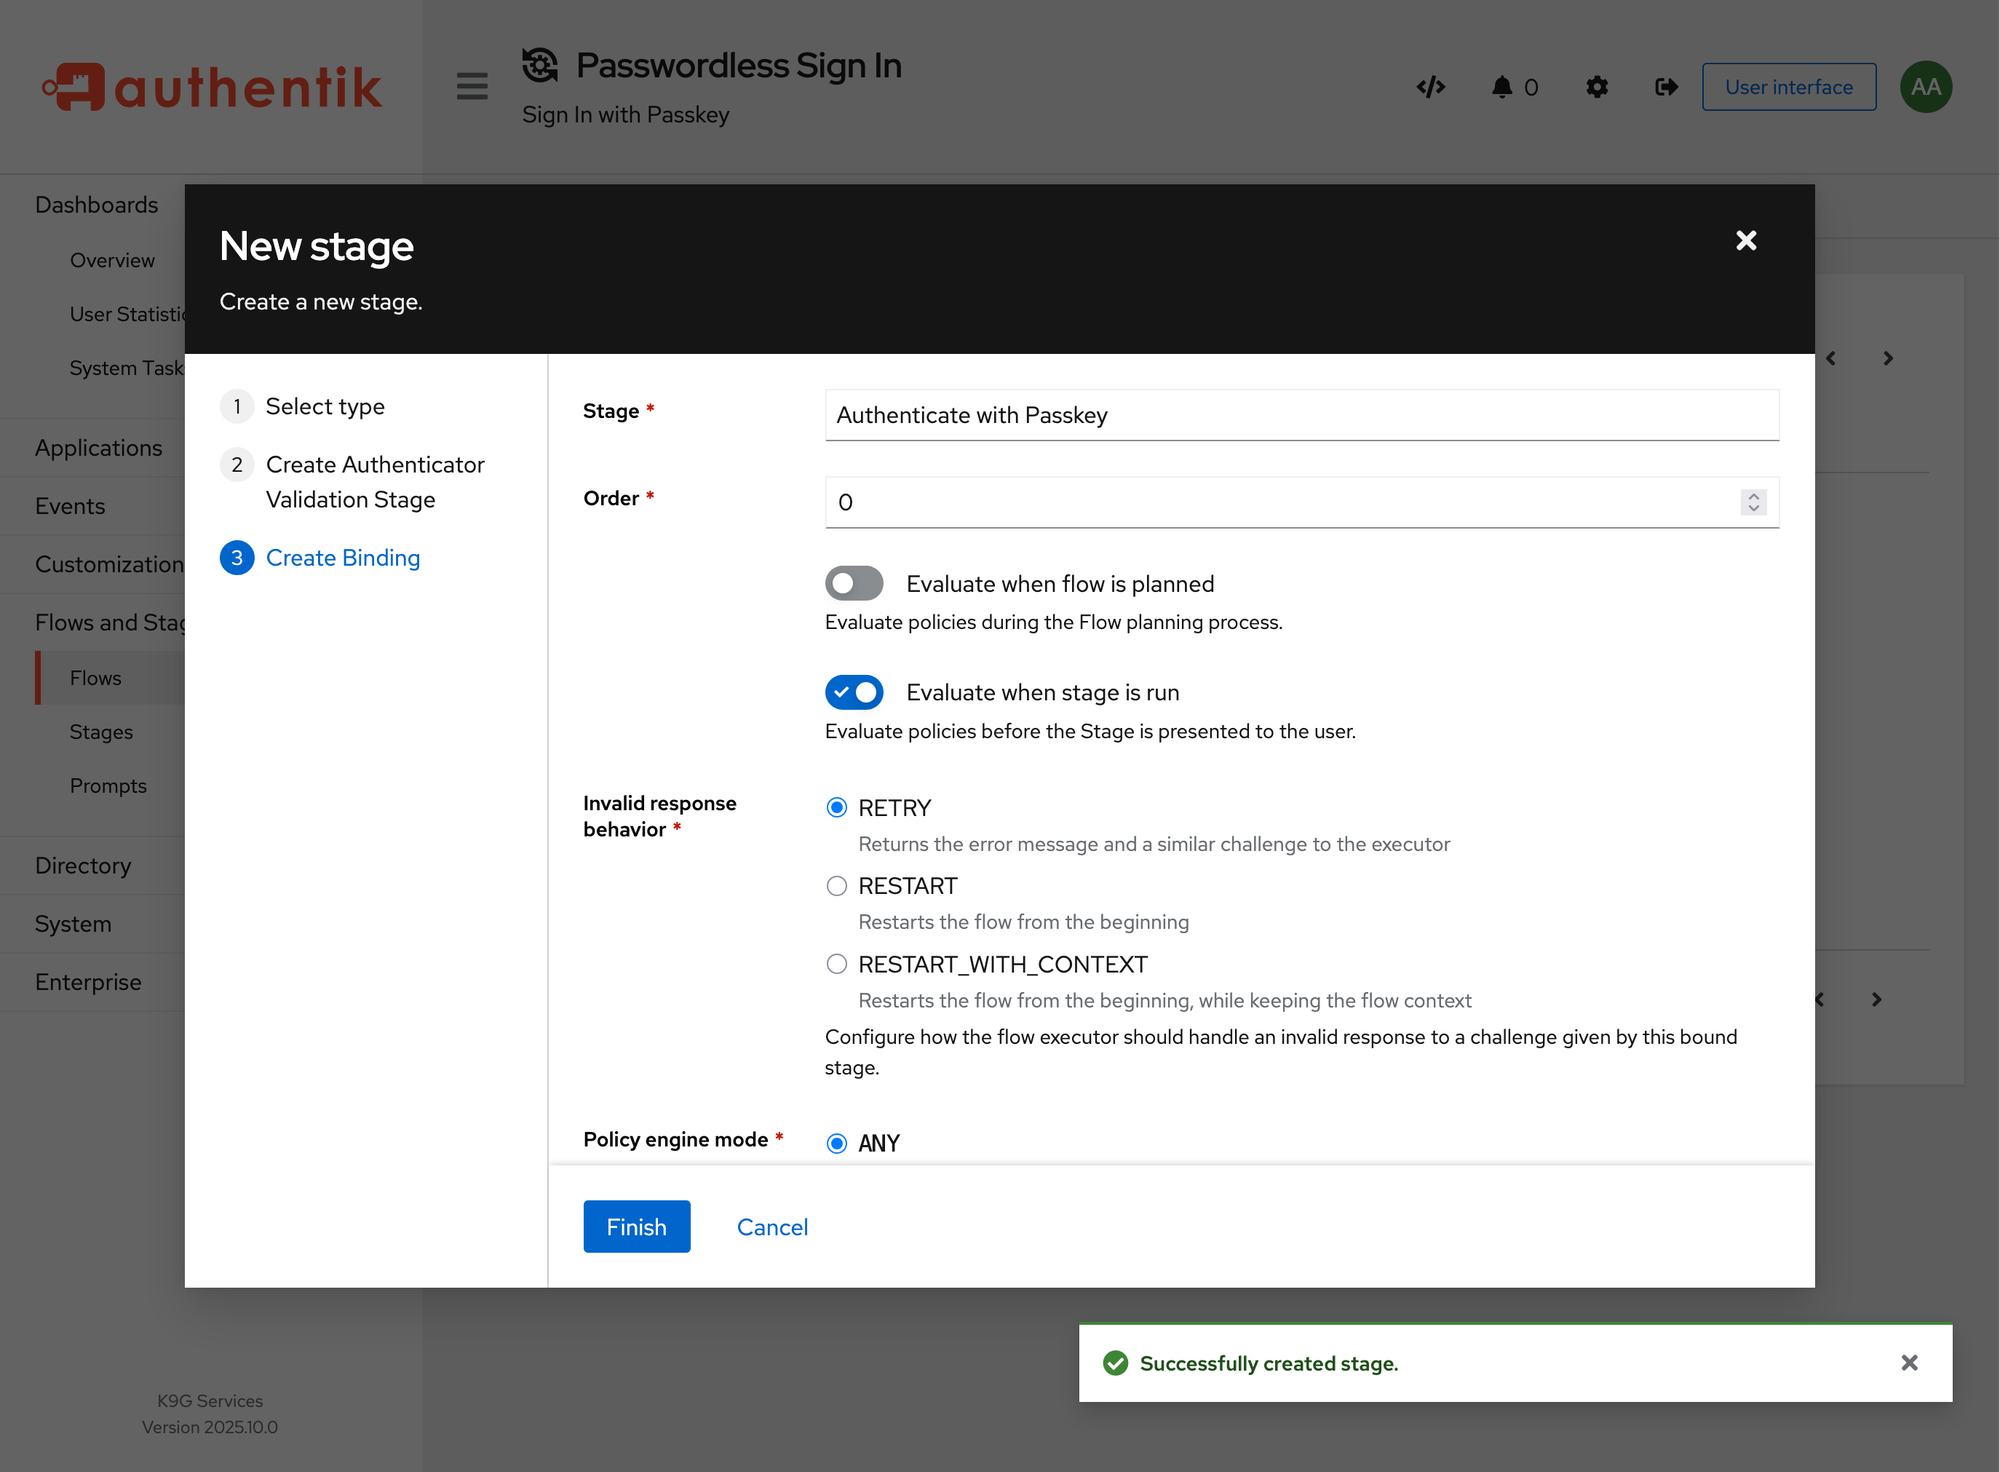
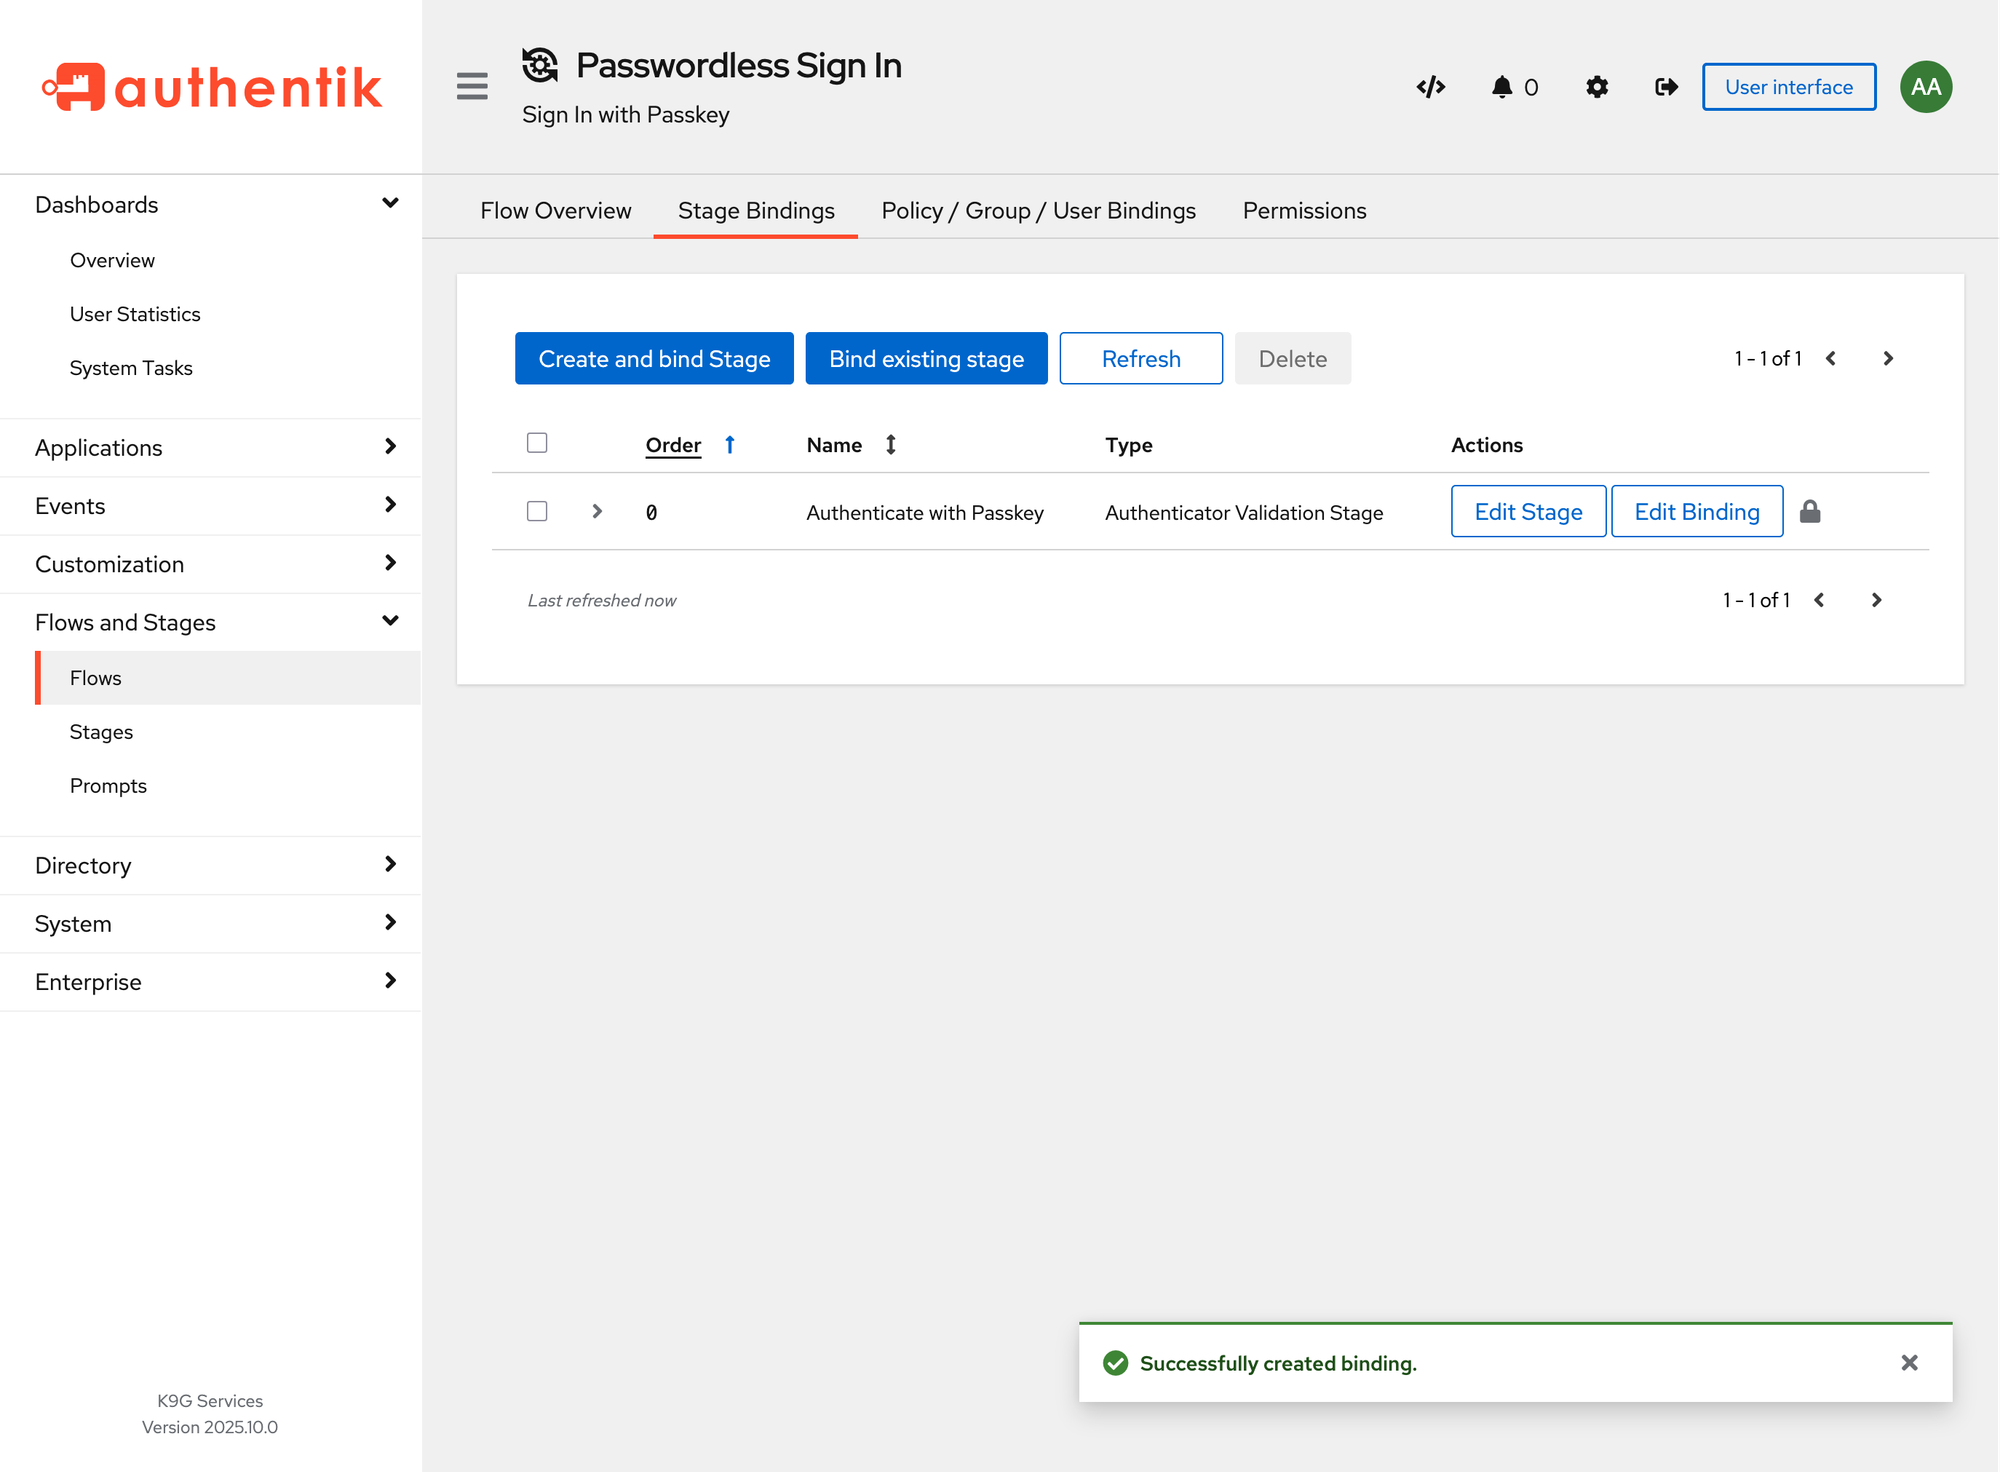
Don't forget to also create or bind a User Login Stage.